Digitization Guidelines
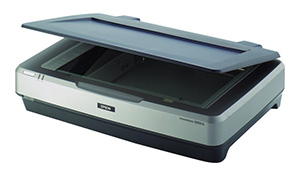
For this project digitizing photographs and textual documents, using a flatbed scanner is the safest and most effective means of preserving the information in the items and allowing others to access it.
Scanning
Before you scan: Make sure that hands are clean and dry when handling materials for scanning or any type of digitization work; all materials should be handled with care and attention. These items cannot be replaced or easily repaired if destroyed or damaged.
CDIL’s scanning stations will be set up and ready for you to work. Below is an overview of the steps:
- Open EpsonScan scanning software.
- Place item to be scanned along the left side of the scanning bed (the glass plate), leaving a slight border between item and edge.
- Close the scanner lid and press “Preview” in EpsonScan.
- Once the preview scan is finished, use the cursor to draw the selection window around the item. There should not be a lot of space between the item and the edges of the selection window.
- For this project, images and documents should be scanned at 300 dpi and should be at least 3,000 pixels on the long edge. This measurement is located at the bottom left of the preview panel. The color filter should be set to “none”.
- Once your settings are correct, click “Scan”.
- The “File Save Settings” window will pop up and you will need to:
- Click “Other” and then “Browse” to select the folder you want your scanned images to be saved to.
- Set up the File Name prefix following this project’s naming convention,
hist454-+ your initials. The Start Number should be at 01 if you’re starting your scanning. - In the Image Format section, the file type should be set to JPEG (*.jpg).
- Press “OK” and the scan will begin.
Assemble PDFs
For your document items that consist of multiple images/pages, we want to deliver the object to users as a complete PDF. Once you have completed scanning all pages of your document, you will have a series of JPEG images.
- In the File Explorer, select all the images of the document by clicking the first to highlight it, then holding Ctrl and clicking all the additional images.
- Right click on one of the selected images.
- In the context menu click “Combine files in Acrobat…”
- This will open the files in Adobe Acrobat. Use the interface to ensure they are arranged in the correct order, then click Create PDF.
Upload Files
Once you have completed your batch of scanning and created PDFs (as necessary), upload the final files (with correct filenames!) into the shared Google Drive folder. Be sure to copy the file names into your metadata template “filename” field!
CDIL staff will transfer the files to project repository. You will have access to the files in the shared Google Drive and final digital collection website.

