Preparing Your Transcript
- Paste Your Transcript Into Google Sheets
- Separate the Cells
- Check for Errors
- Read Your Transcript
- Name Your Transcript
- Make a Copy of Your Transcript
Paste Your Transcript Into Google Sheets
-
Create a new Google Sheet
-
In the first row, title four columns
timestamp,speaker,words, andtags -
In a new browser tab, open your transcript as a Google Doc
-
Copy all of the text of the transcript (leave out any biographical information at the beginning)
-
Switch back to the Google Sheet you created
-
Click on the cell underneath
speaker -
Click on
Edit>Paste Special>Paste Values Only
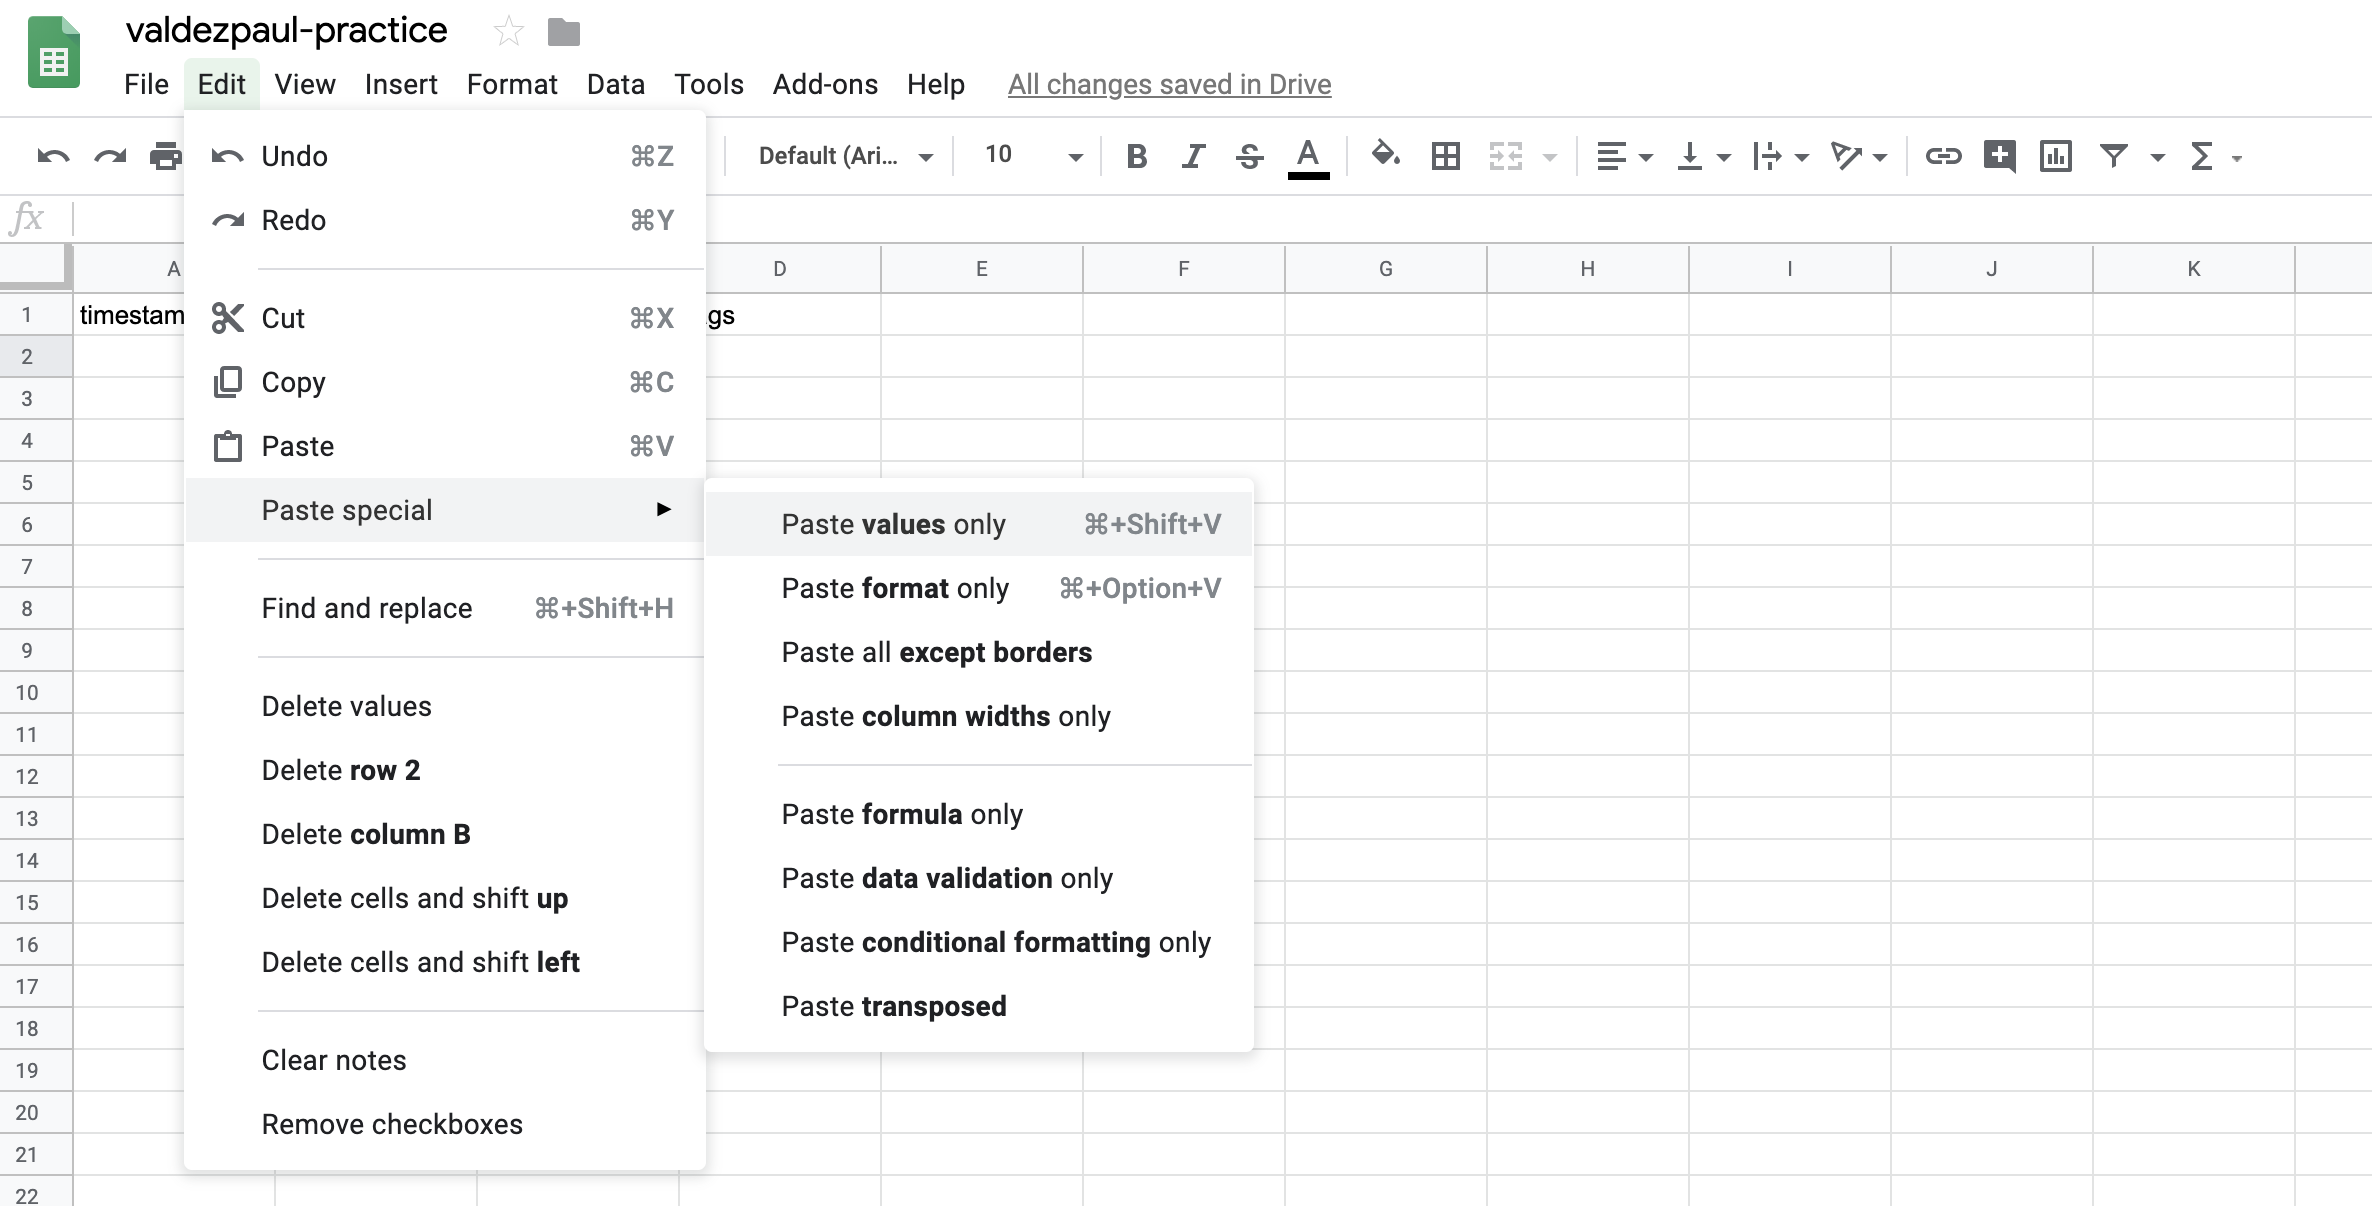
-
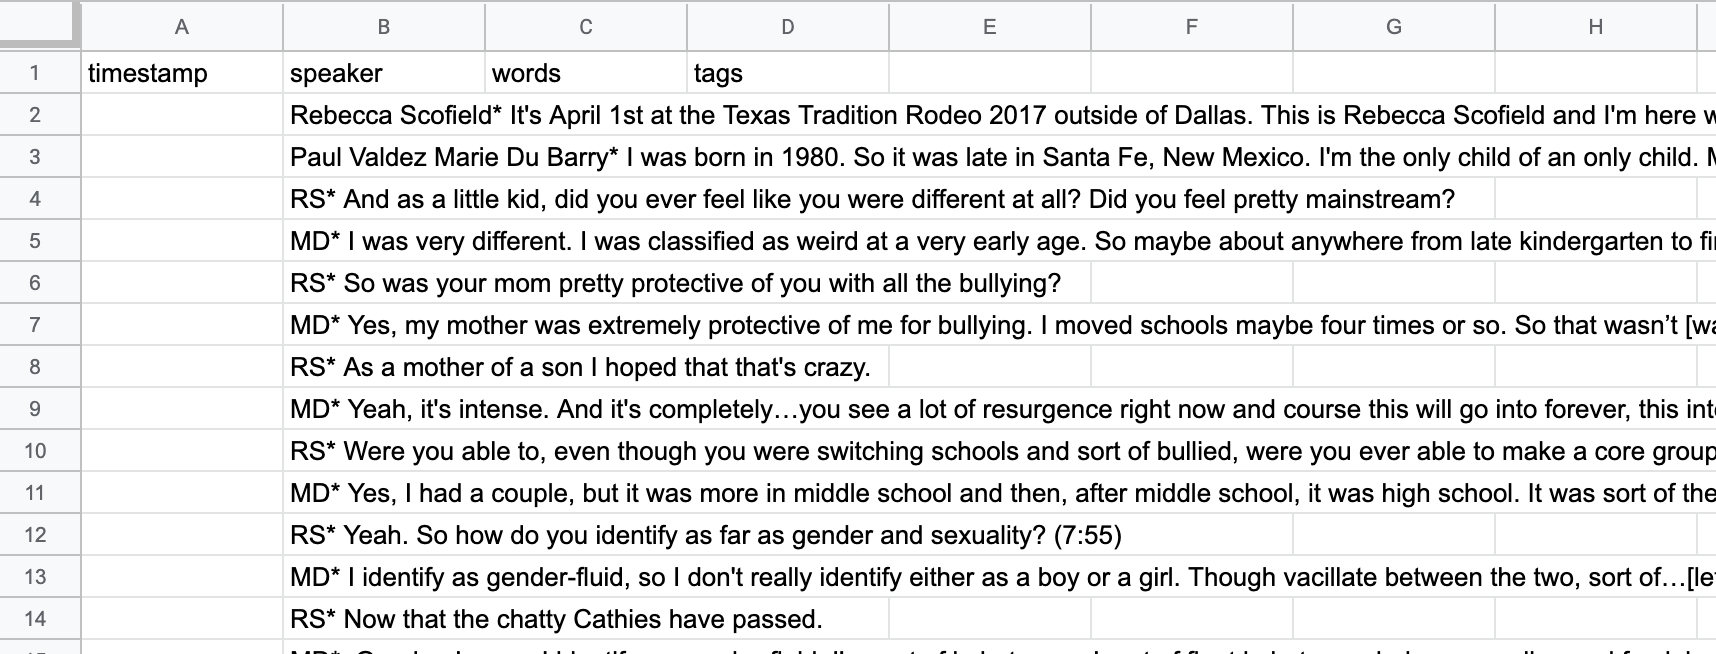
This should paste all the transcript text into the rows of the second column
-
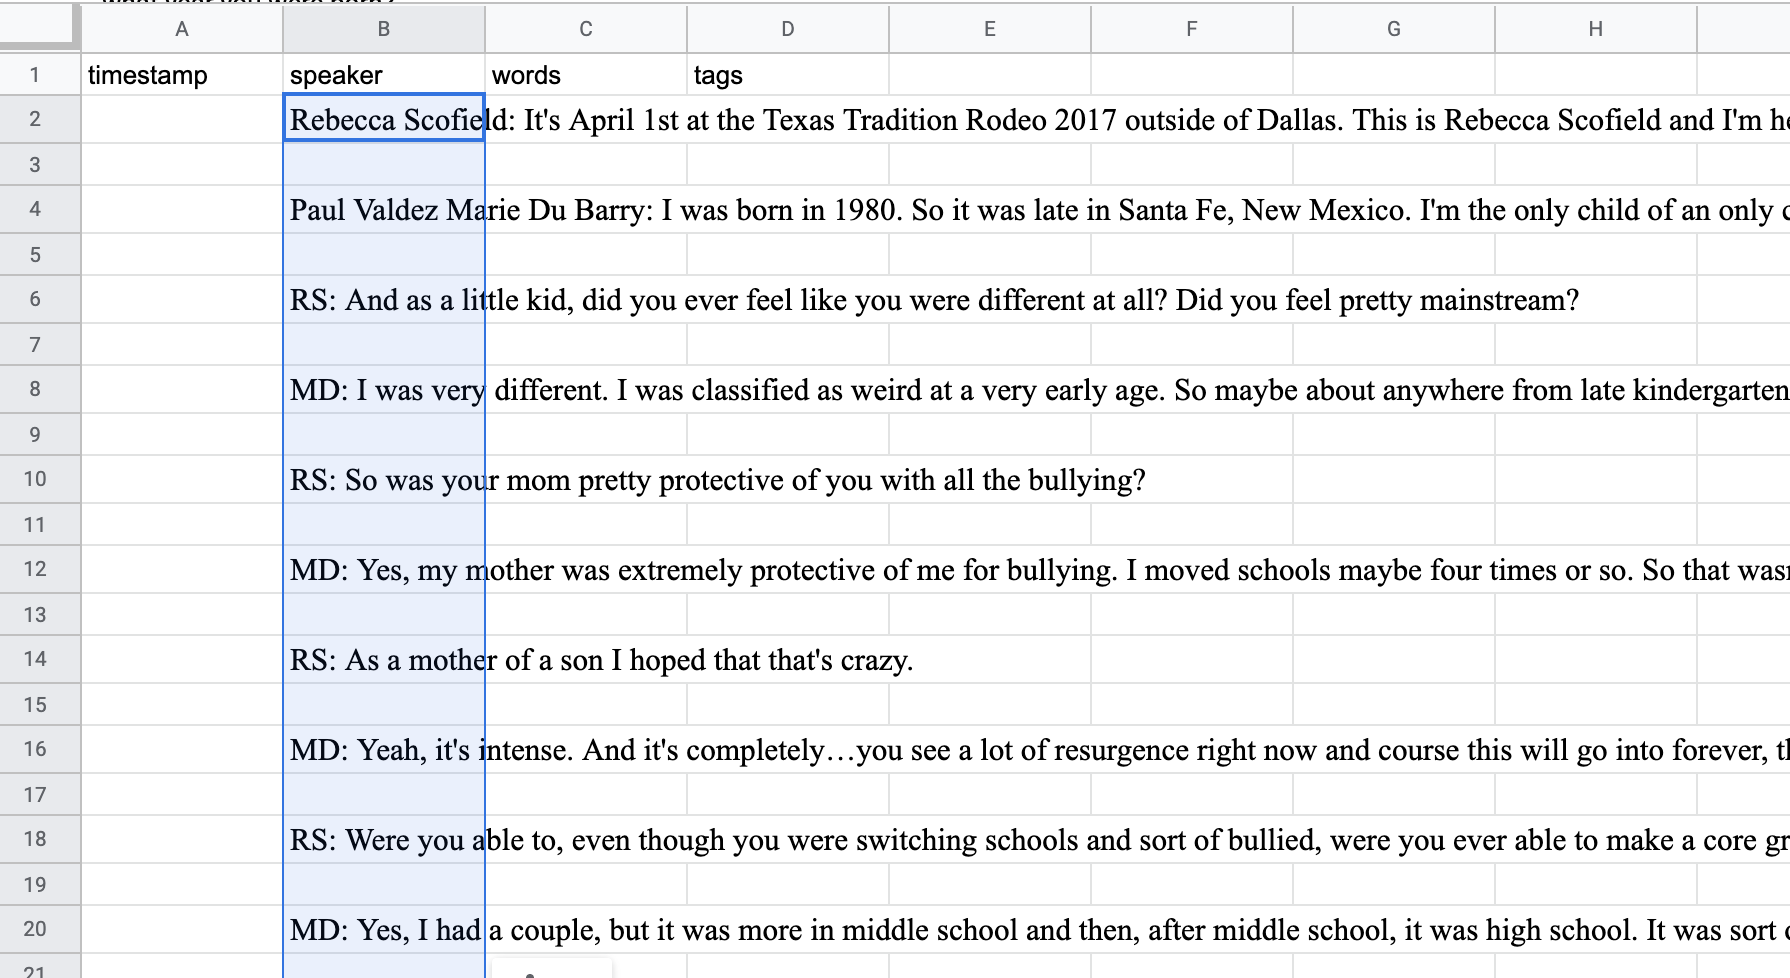
Note: Your transcript rows should not have a space between them. If you do have spaces between your rows, see below.
Removing Spacing Between Rows
If the text you paste into your Google Sheet looks like this…
…you need to remove the space between paragraphs in your Google Doc. Follow the steps below:
- Return to the Google Doc version of your transcript
- Select all of the transcript text
- In the top right of the screen, look for the
line spacingbutton (three horizontal lines next to a vertical arrow). In the dropdown options, click onCustom spacing.
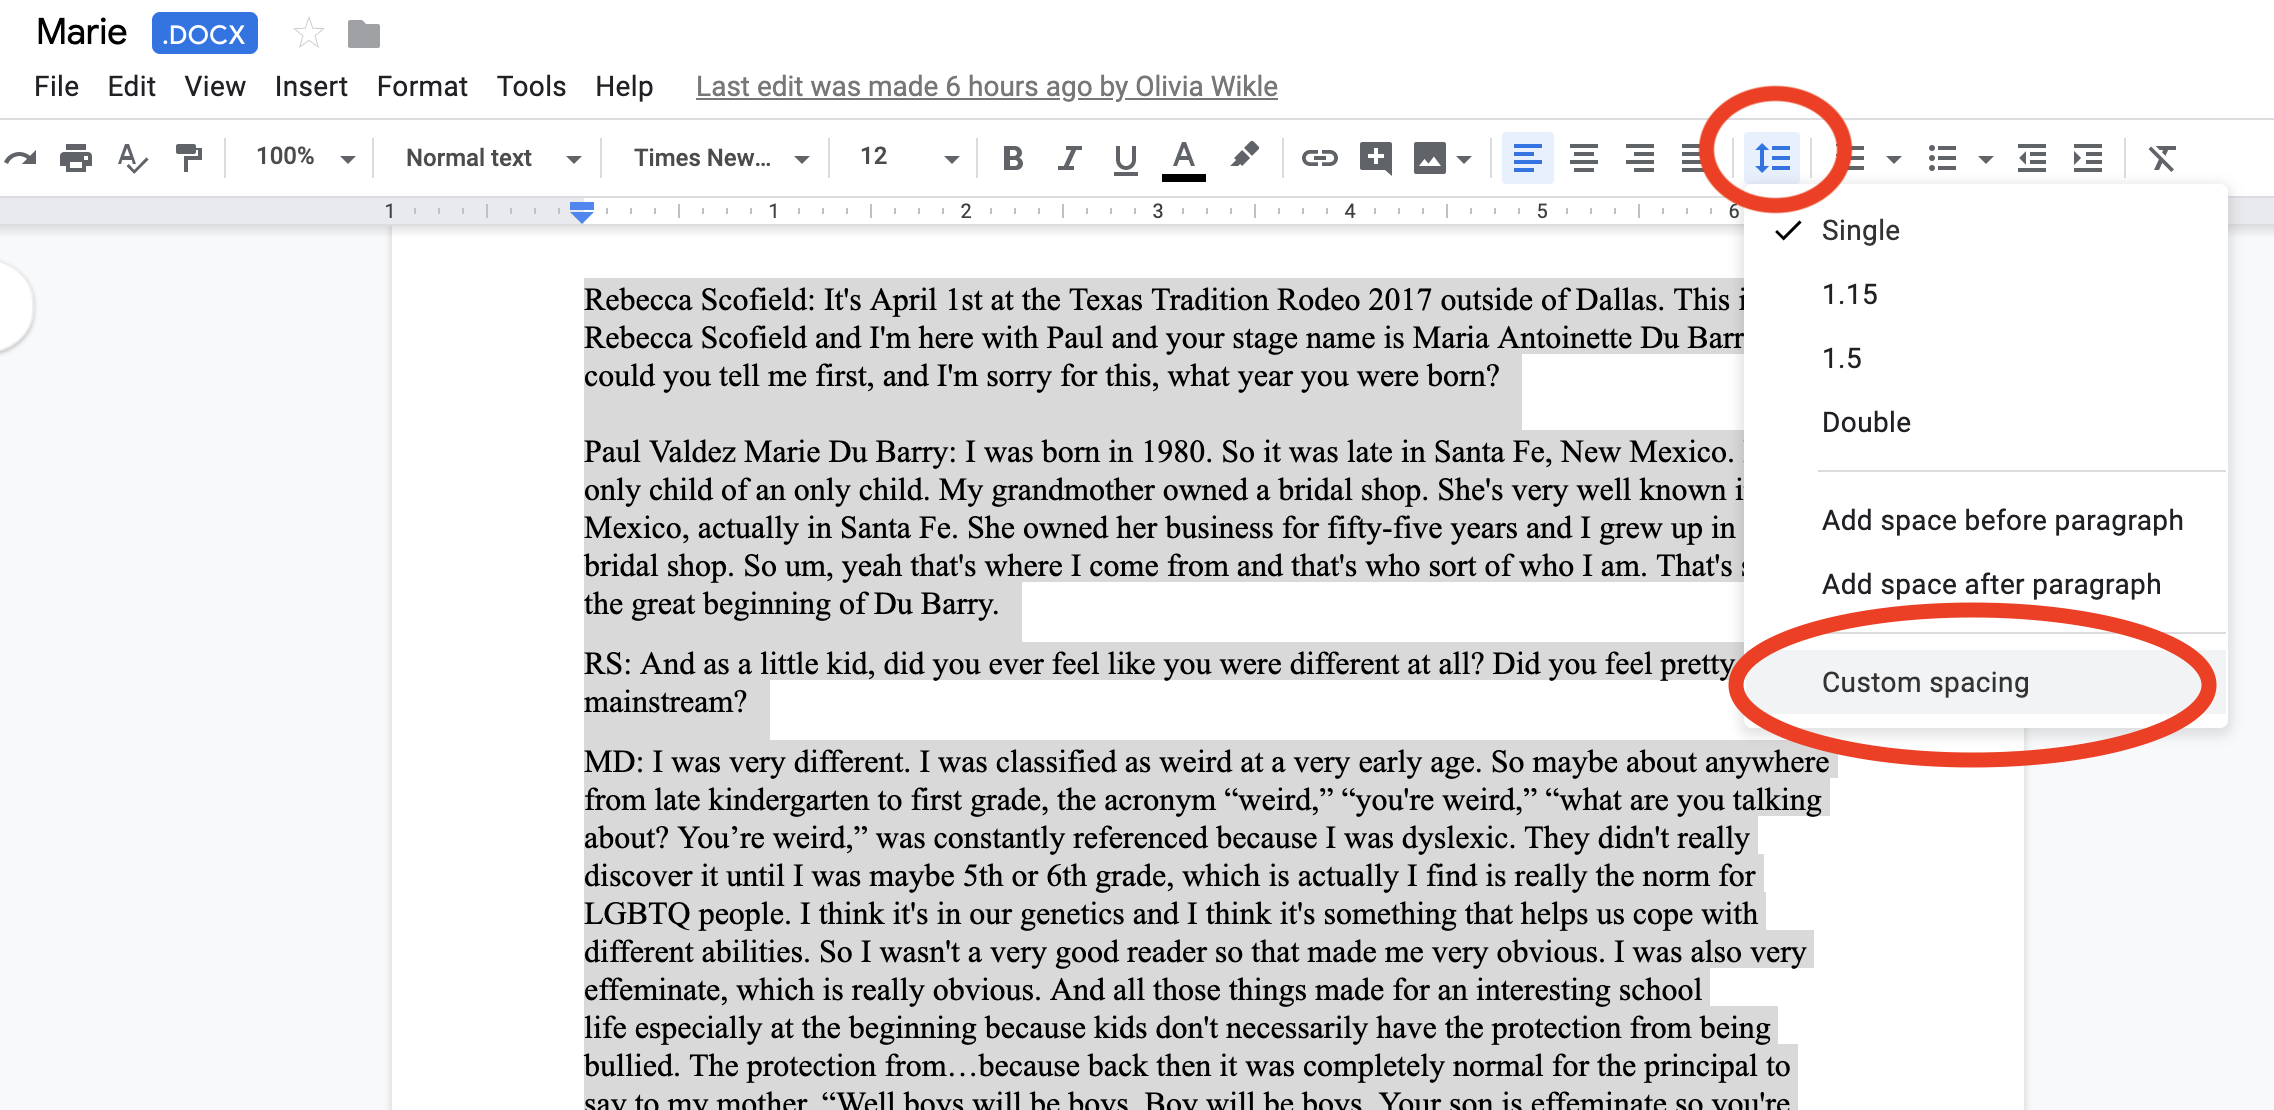
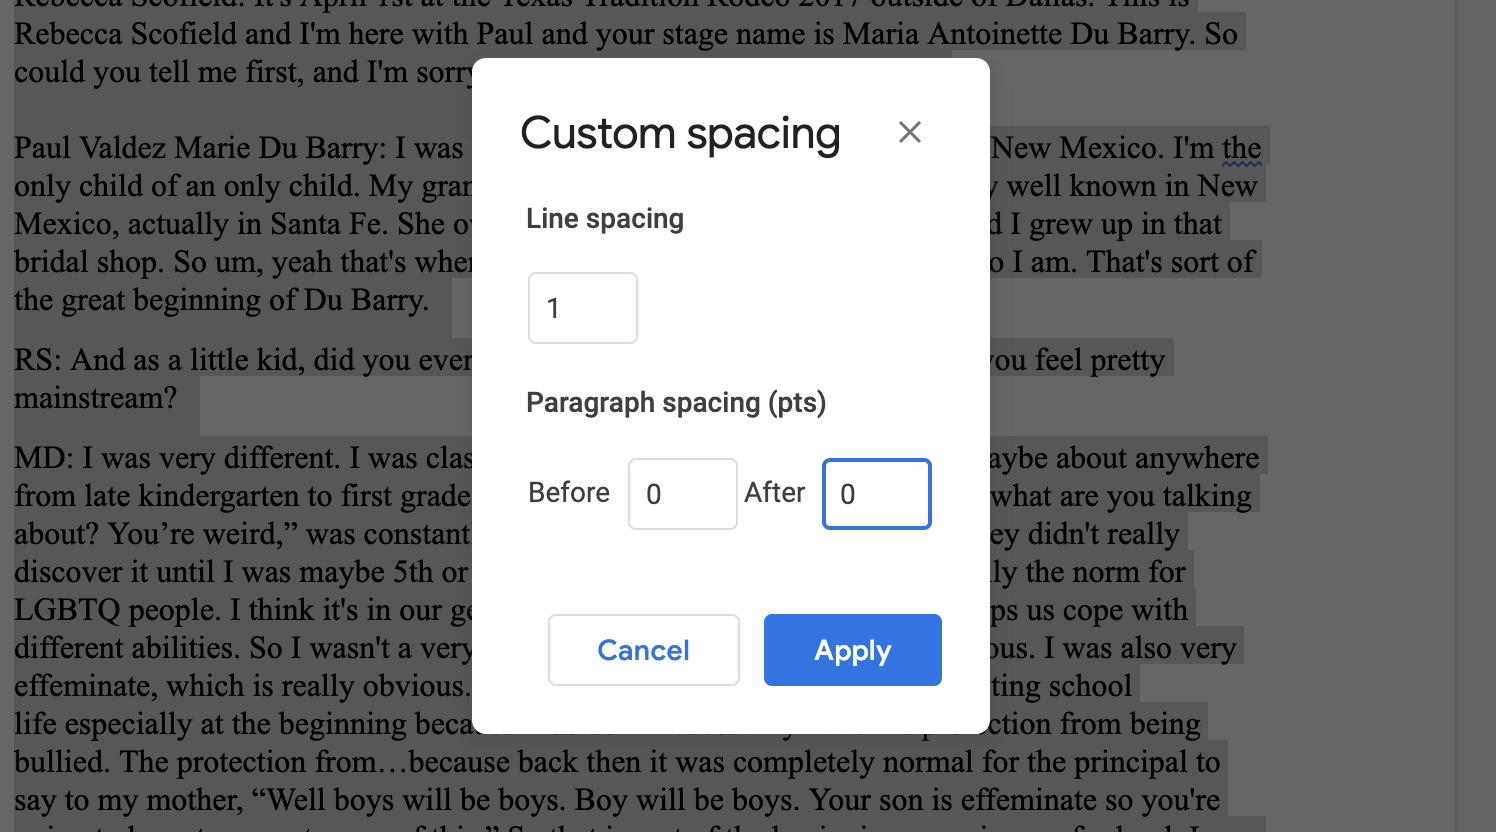
- A
Custom spacingpopup will appear. Make sure the text boxes to the right ofBeforeandAfterhave values of0. ClickApply:
- Now follow the steps above to copy and paste this text into your Google Sheet
Separate Your Cells
Add a Separator
-
Open Find and Replace:
-
Press
ctrl+f(on PC) orcmd+f(on Mac) -
A search box should appear in the top right of your screen. Click on the
More optionsbutton to the right of the search box (three vertical dots). A box labeledFind and replacewill appear in the middle of your screen.
-
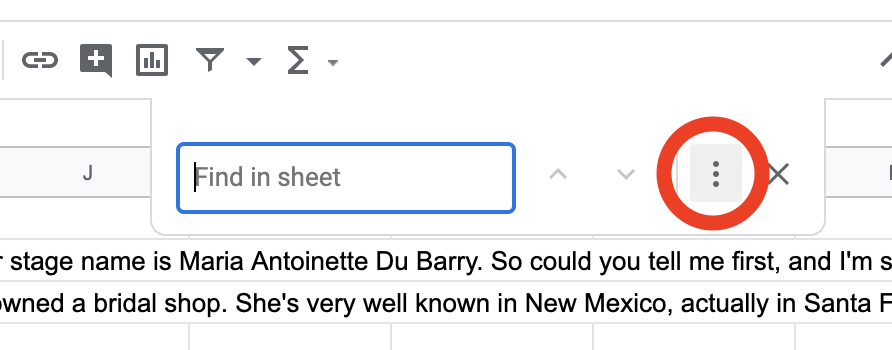
-
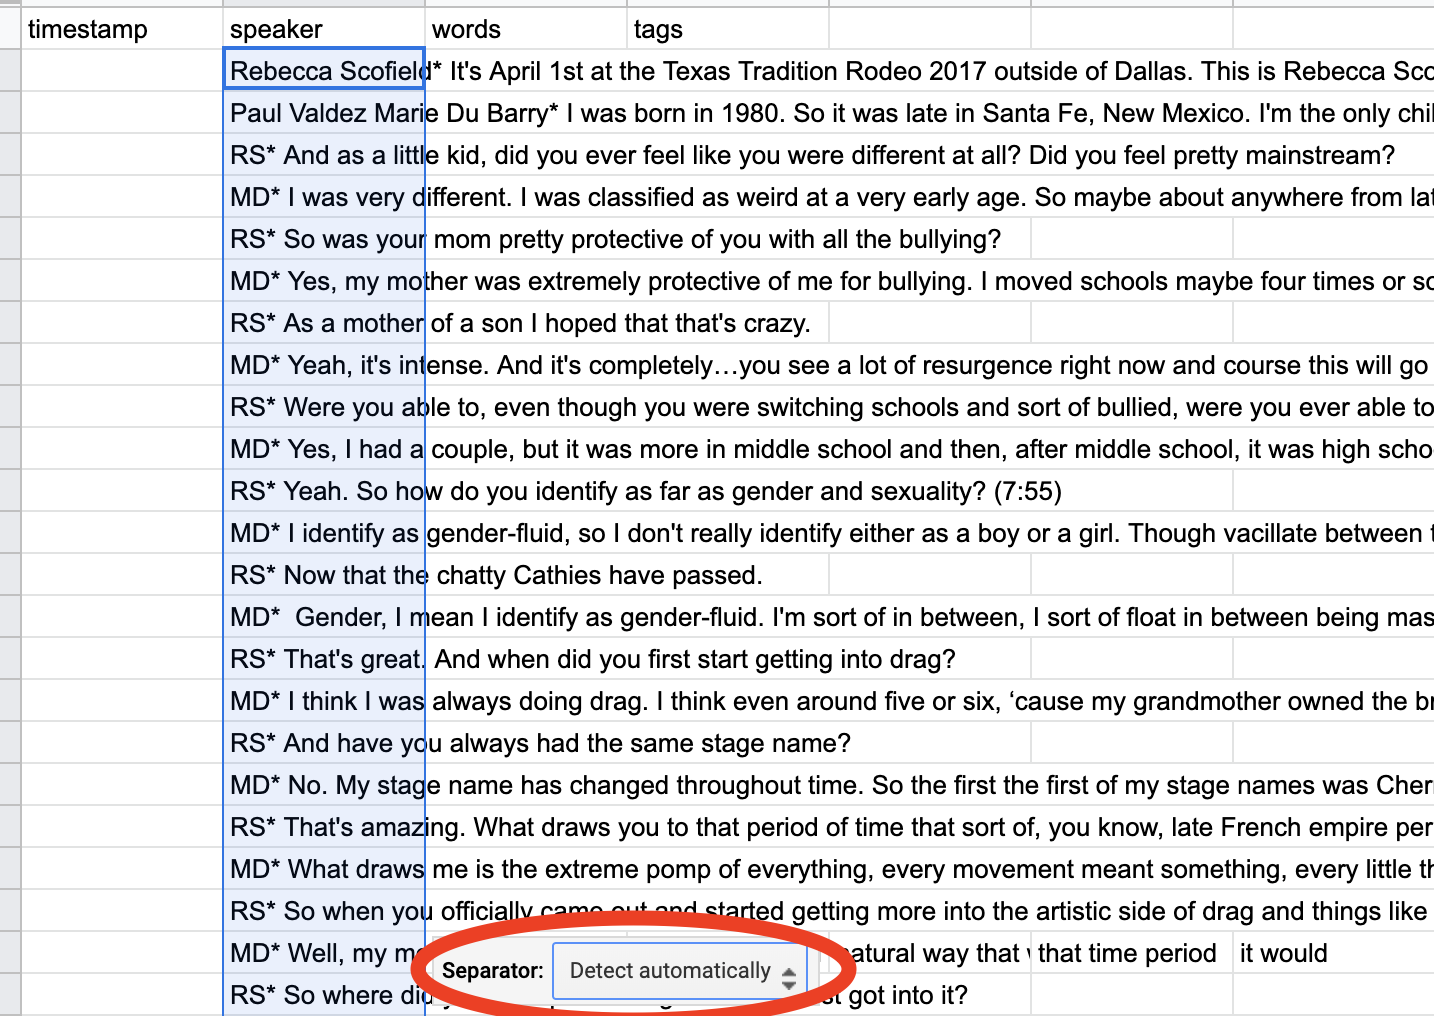
In the
Findbox, enter the initials of the first speaker (ex.RS) -
In the
Replacebox, enter the initials of the first speaker, plus an asterisk (*) (ex.RS*)

-
Click the
Replace allbutton. Then clickDone -
Repeat the steps above for the initials of the second speaker and the speakers’ full names
-
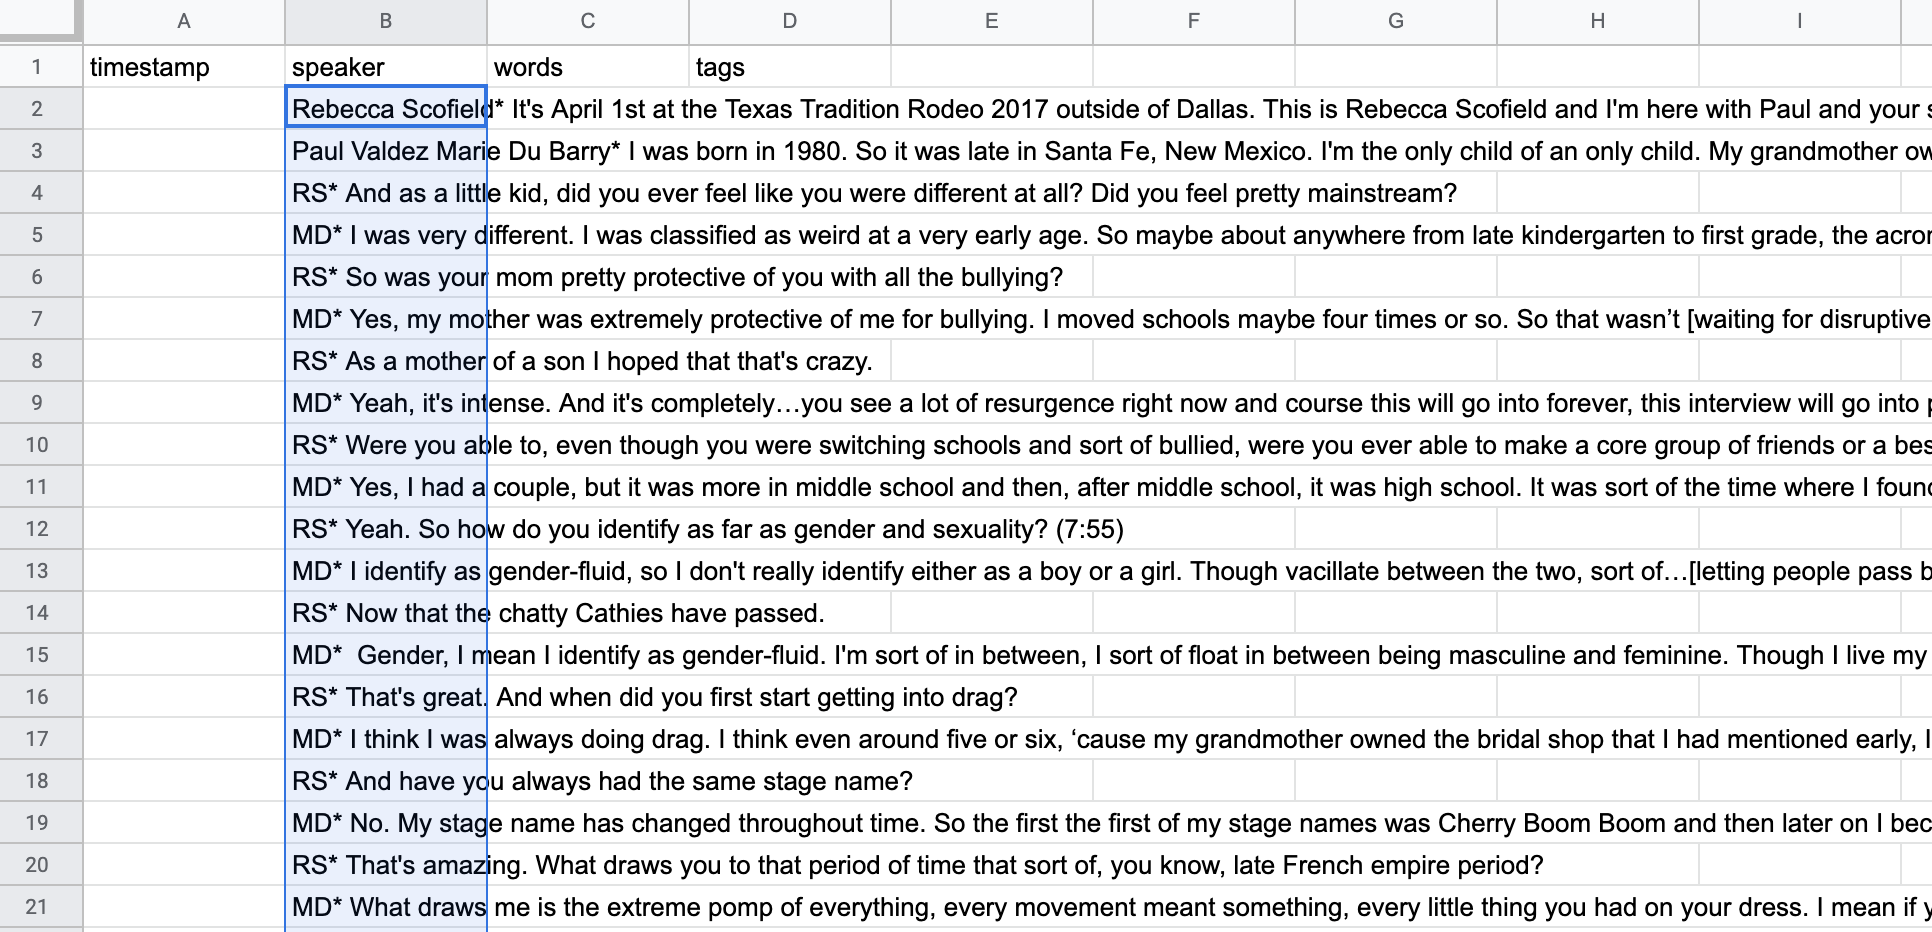
Your spreadsheet should now look like this:
Separate
- If they aren’t selected already, select the cells you just pasted, so that your sheet looks like this:
- Click on
Data>Split Text to Columns
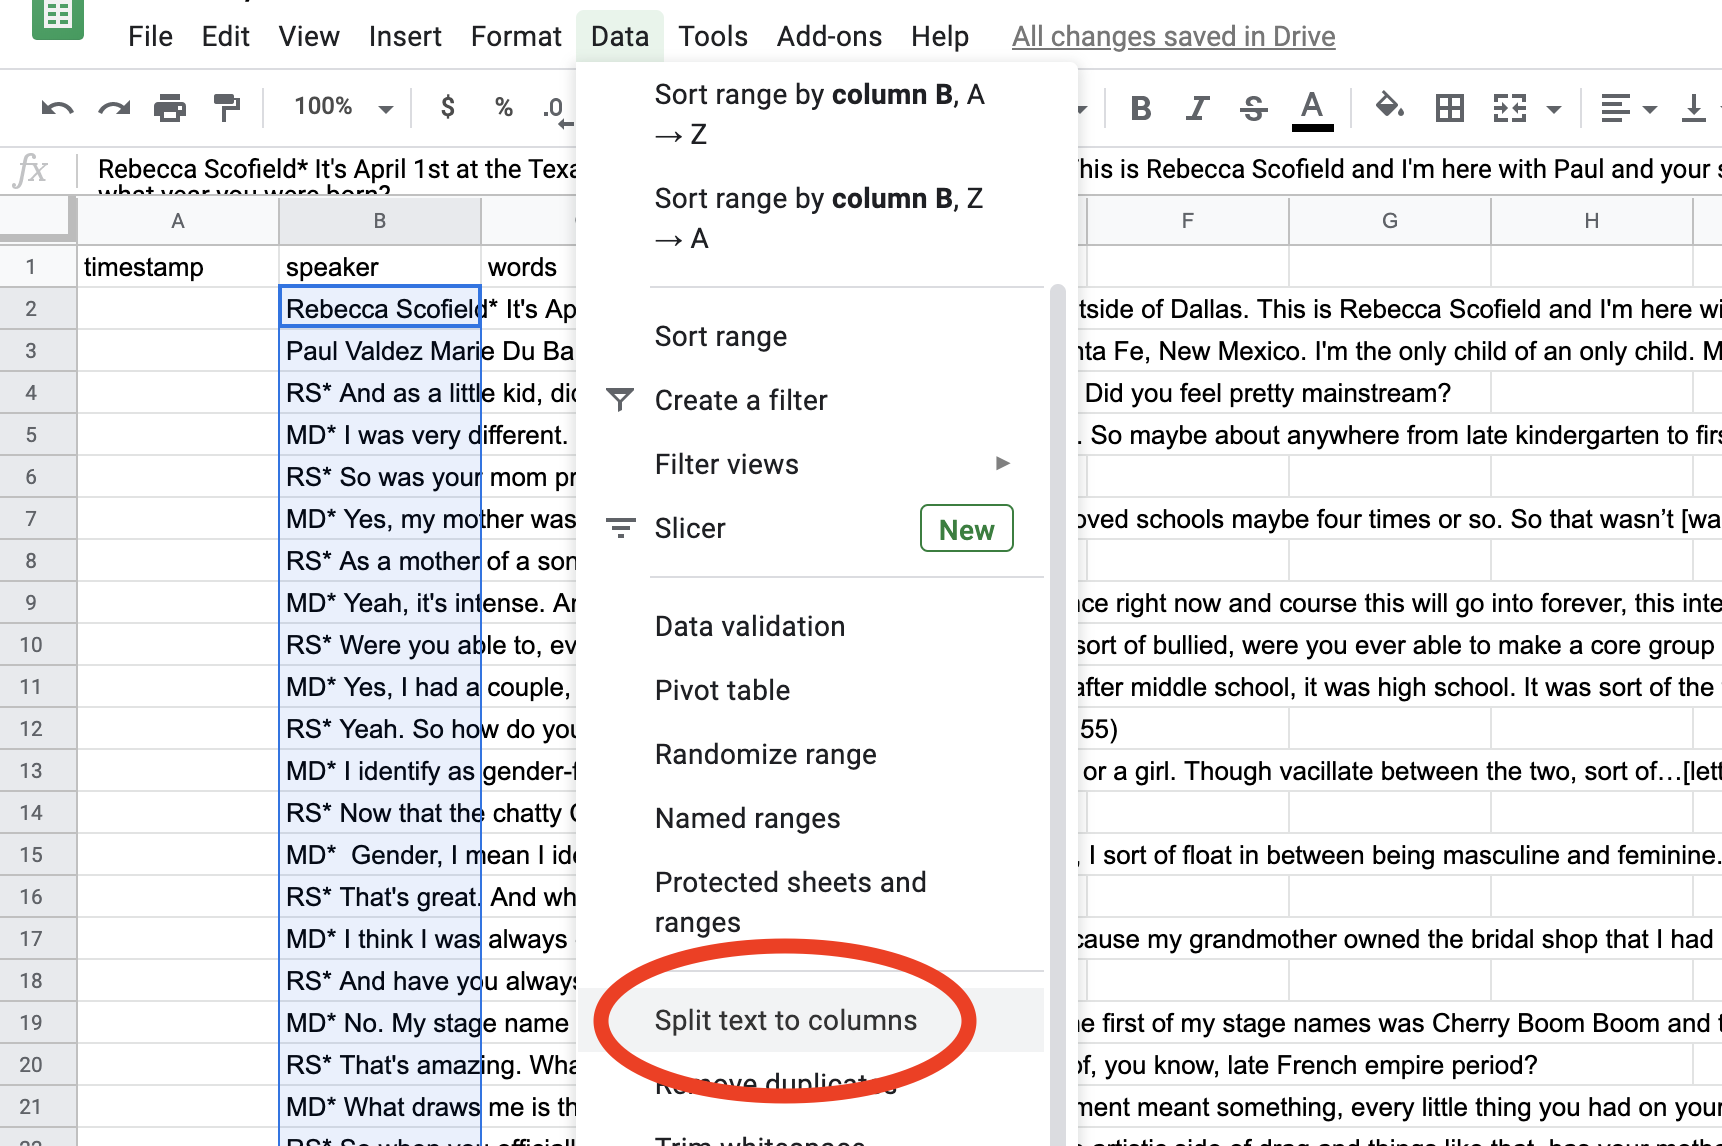
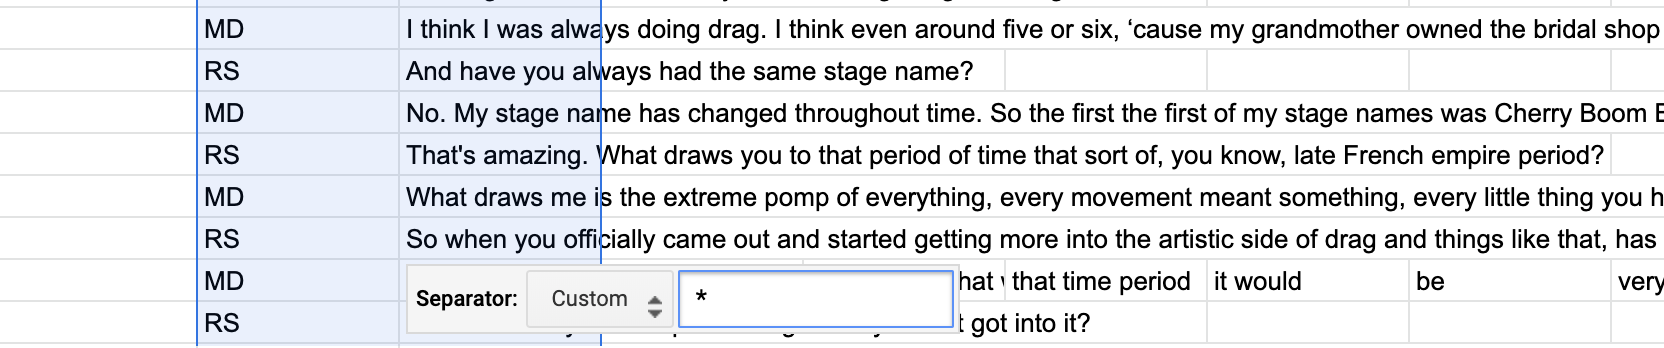
- A little box labeled
Separator:will appear near the bottom of your screen. Click on the arrows to the right ofDetect Automatically
-
Select
Customfrom the list of choices that appears. -
A box should appear labeled
Custom separator -
Enter an asterisk (
*) followed by a space (
Make sure your asterisk is followed by a space! Otherwise your transcript might not work right for the website.
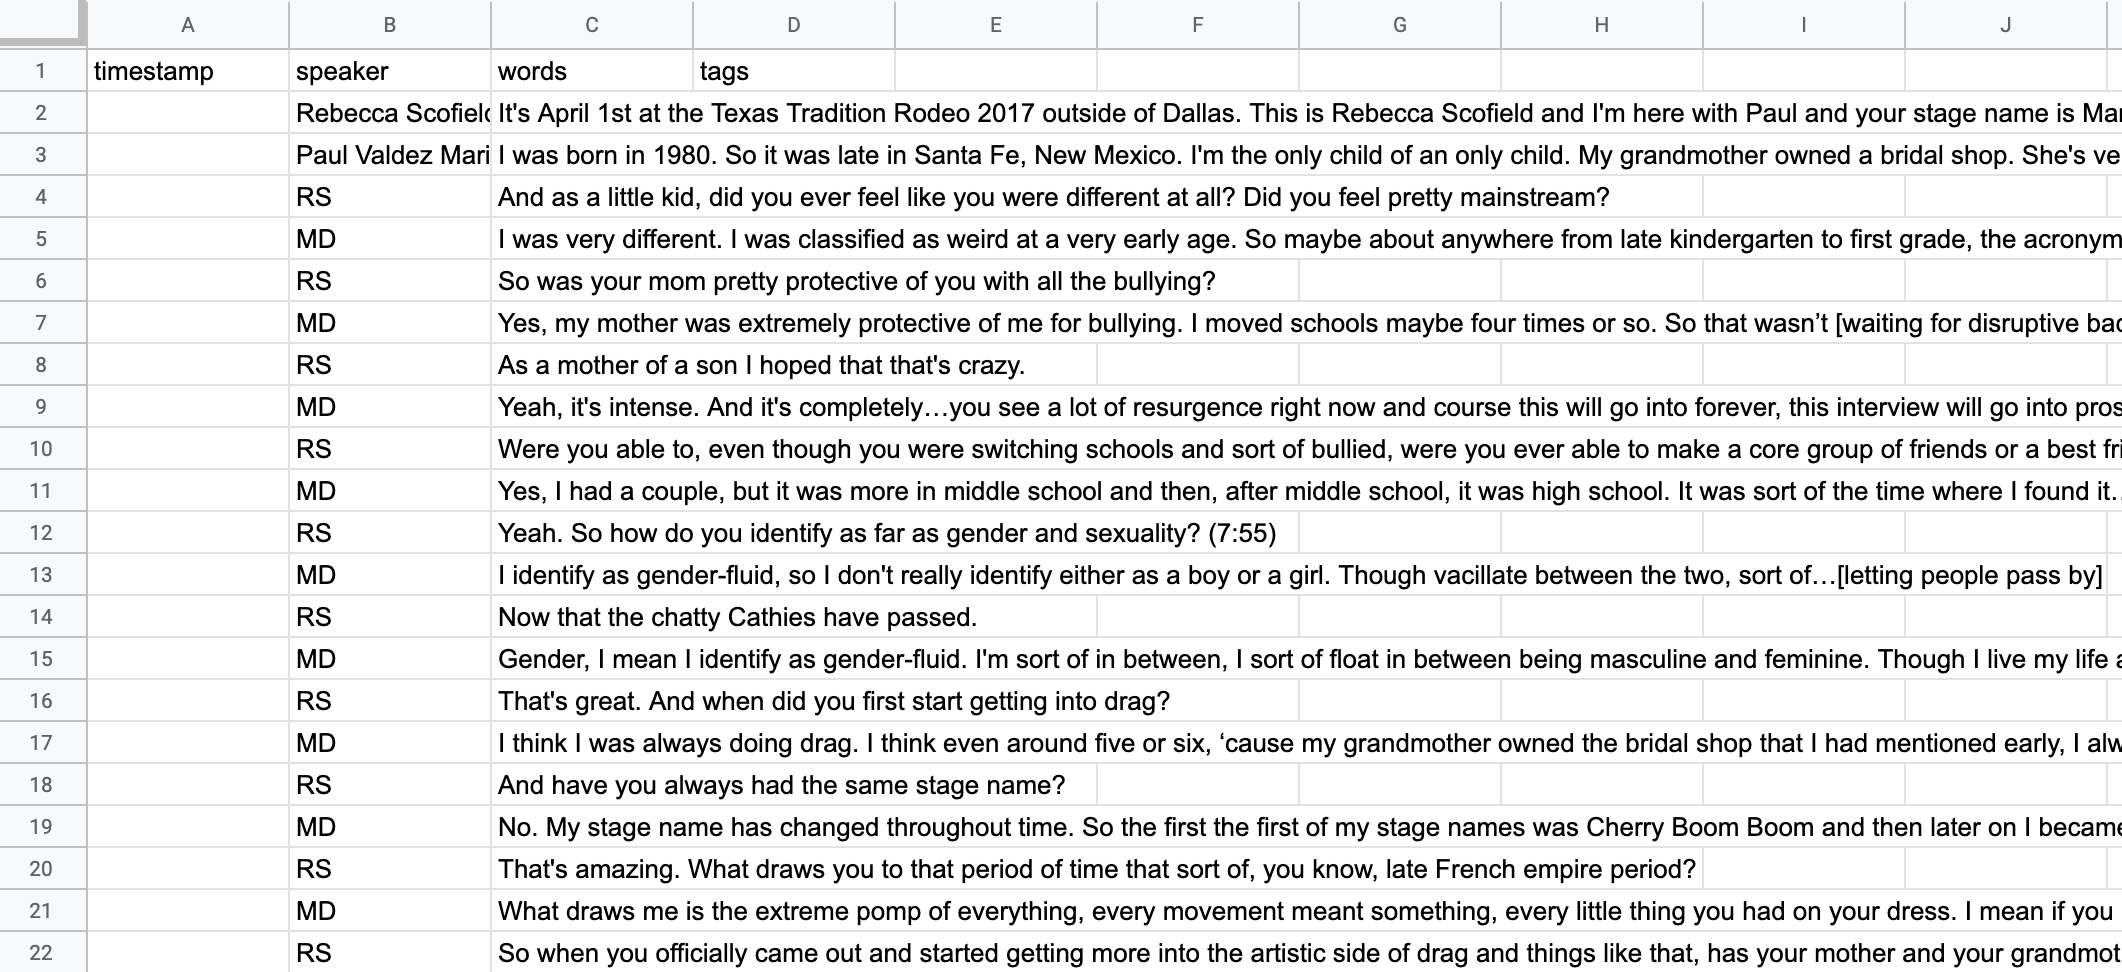
- The text should separate into a new column automatically:
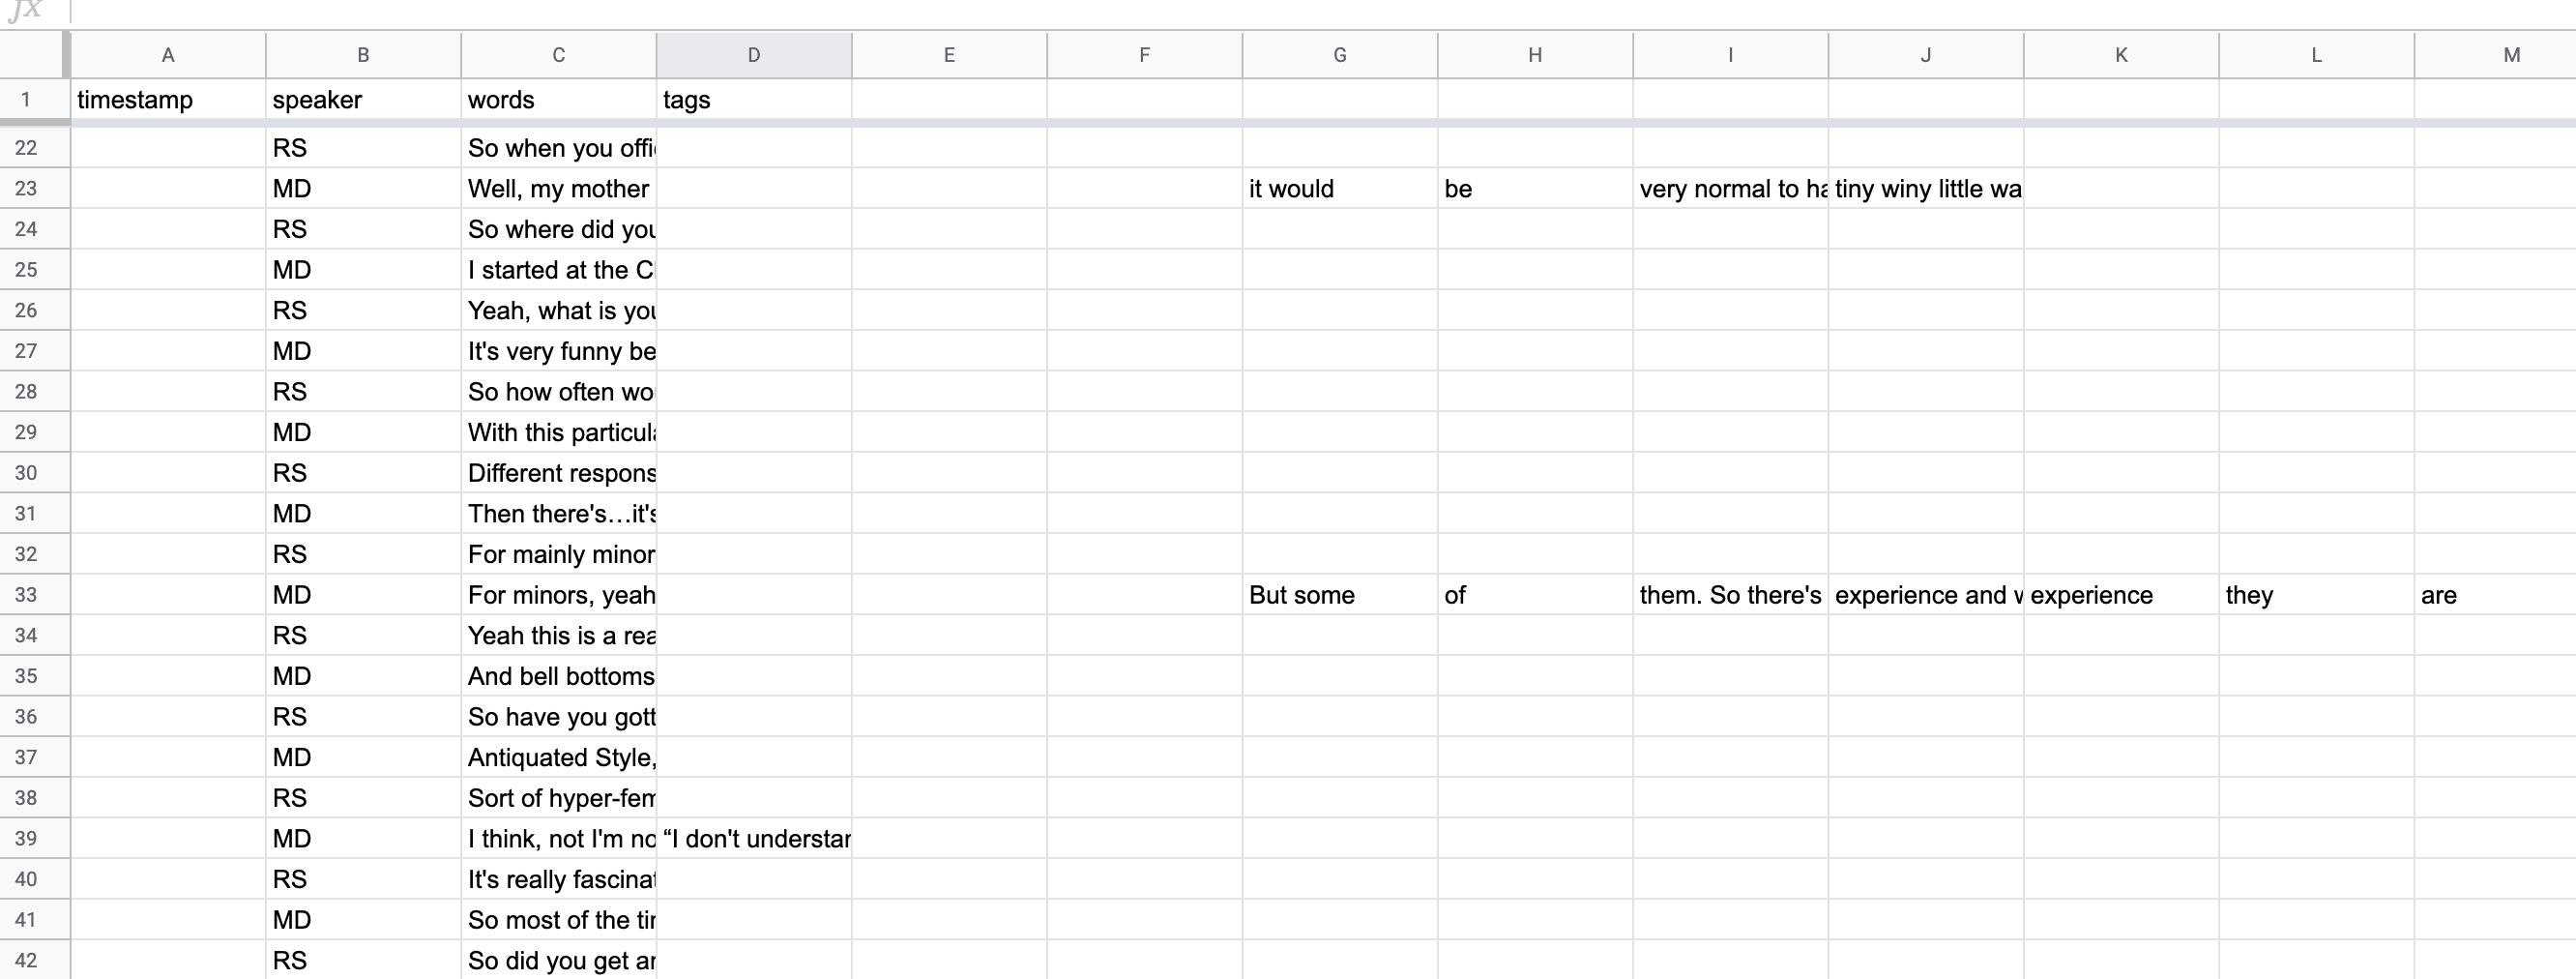
Check for Errors
-
There is likely to be some text that accidentally got separated out to extra columns. To easily find this, select the entire spreadsheet so it’s highlighted in blue
-
Click on
Format>Text wrapping>Clip
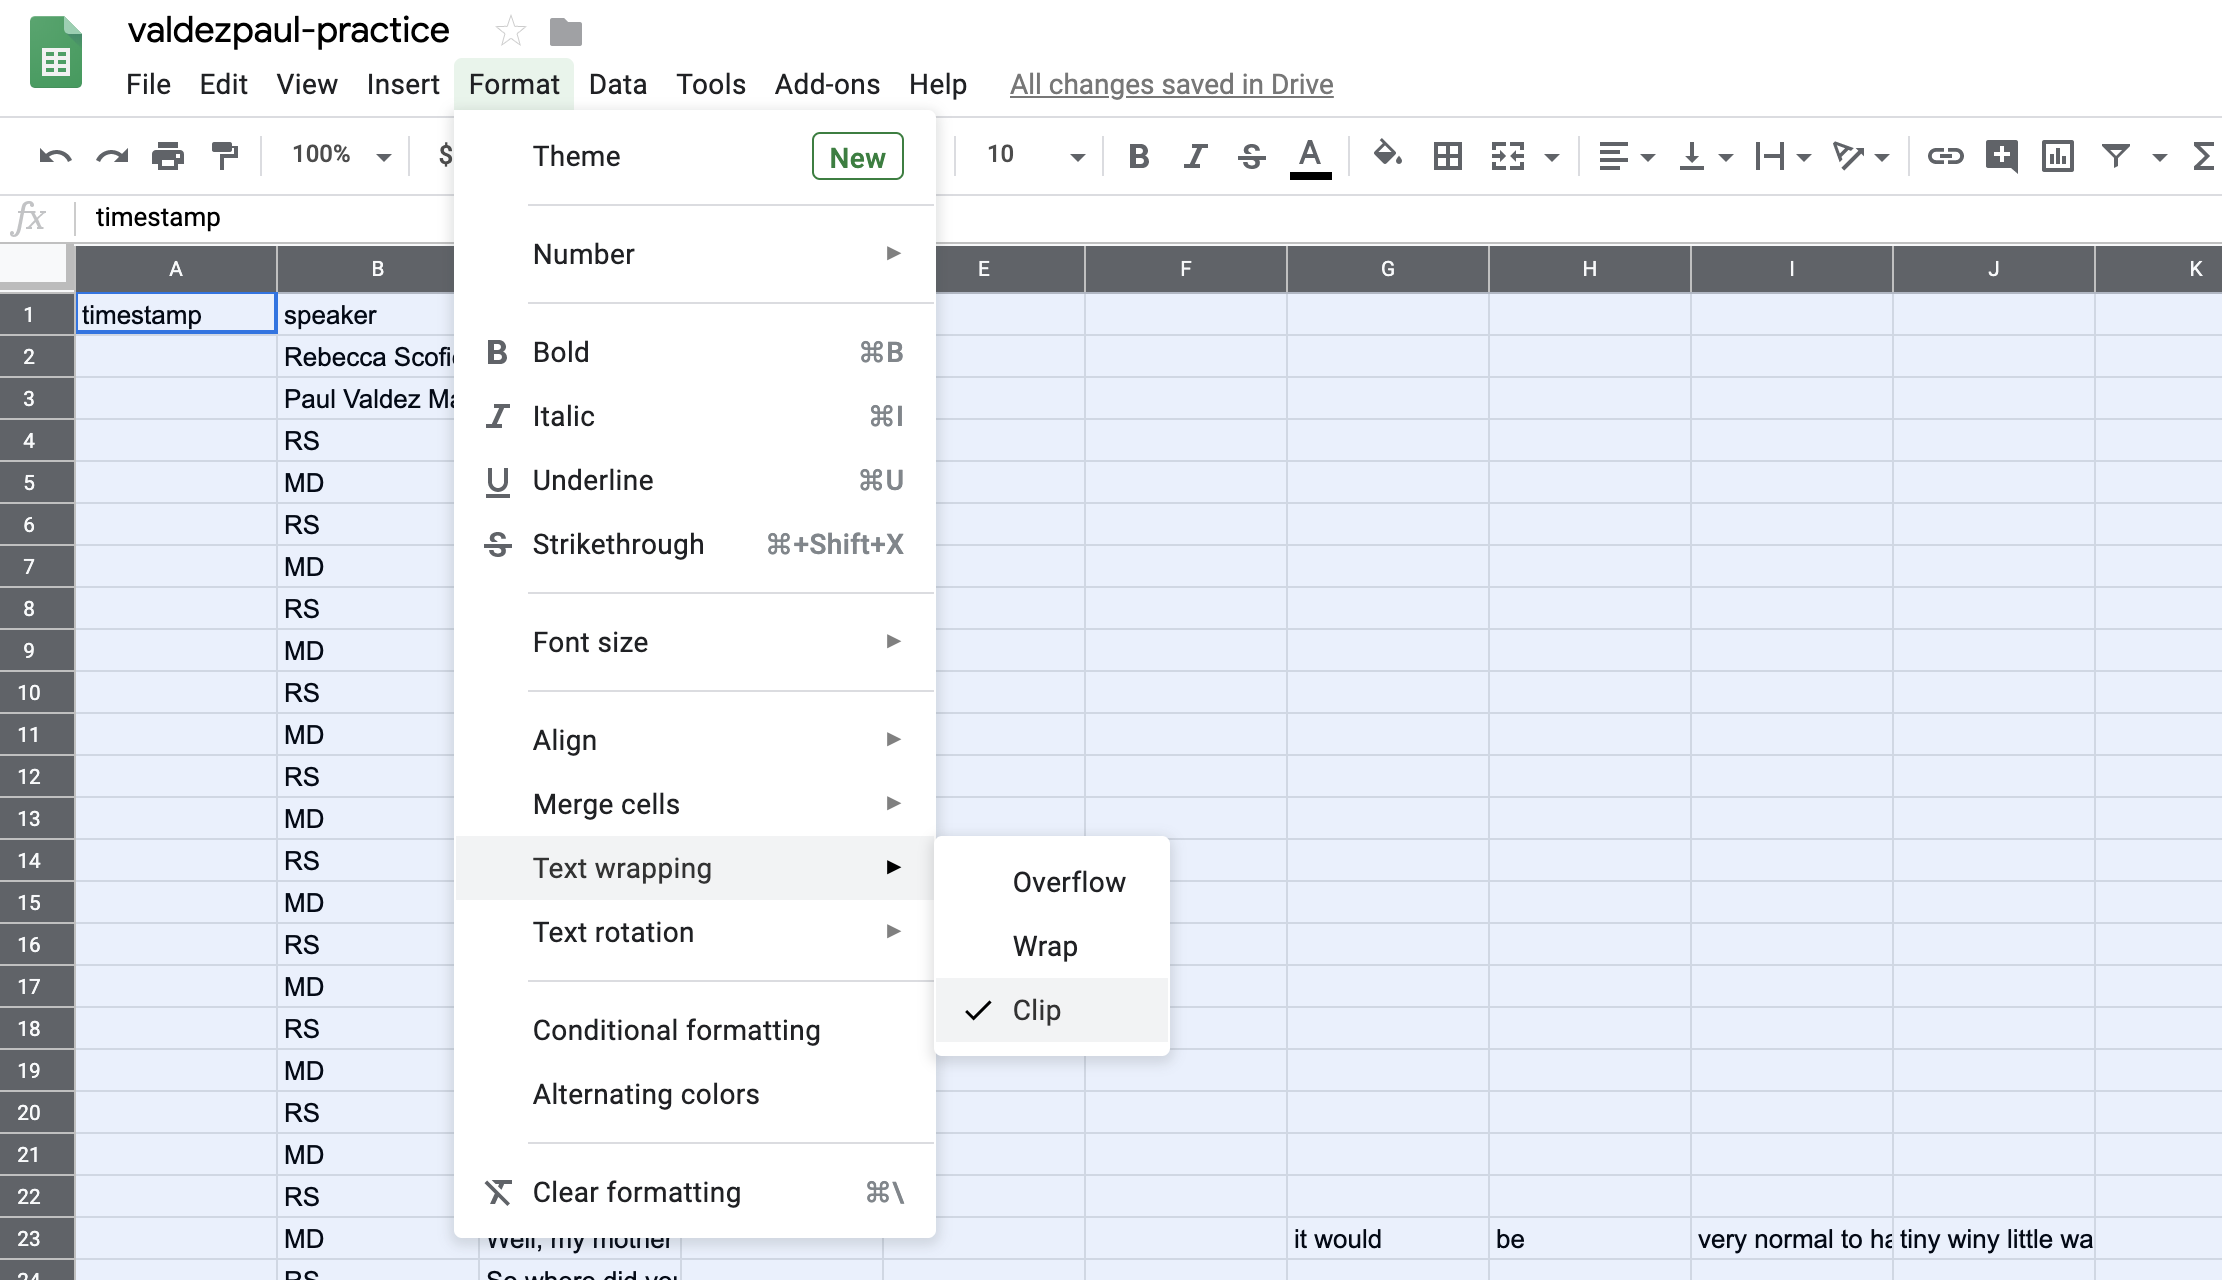
- Now you can see text that should be in the
wordscolumn:
-
Copy and paste this text back into the appropriate
wordscells (you’ll likely need to refer back to the Google Doc version of the transcript to verify that you’re putting it in the right place) -
When this text is cleaned up, change the formatting to “Wrap” by selecting the entire spreadsheet again and clicking
Format>Text wrapping>Wrap. -
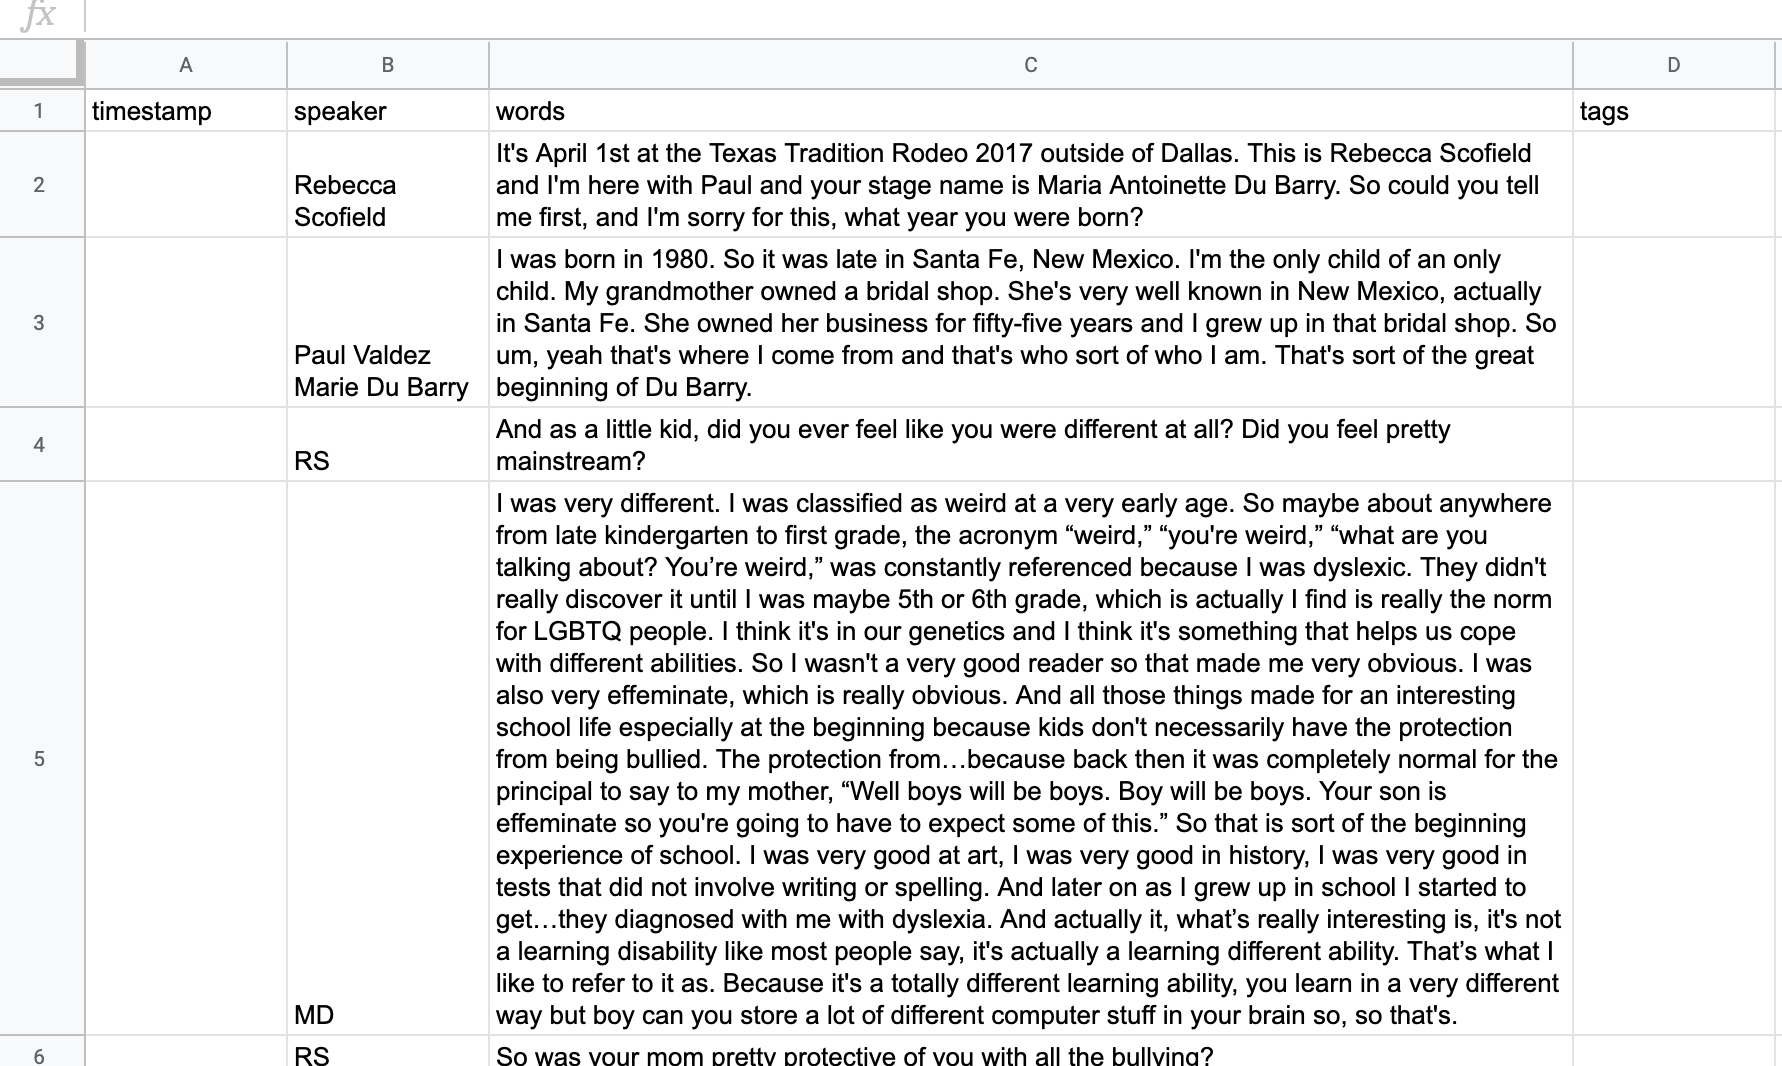
Expand column C (the
wordscolumn) so you can comfortably read the text. Your transcript should now look something like this:
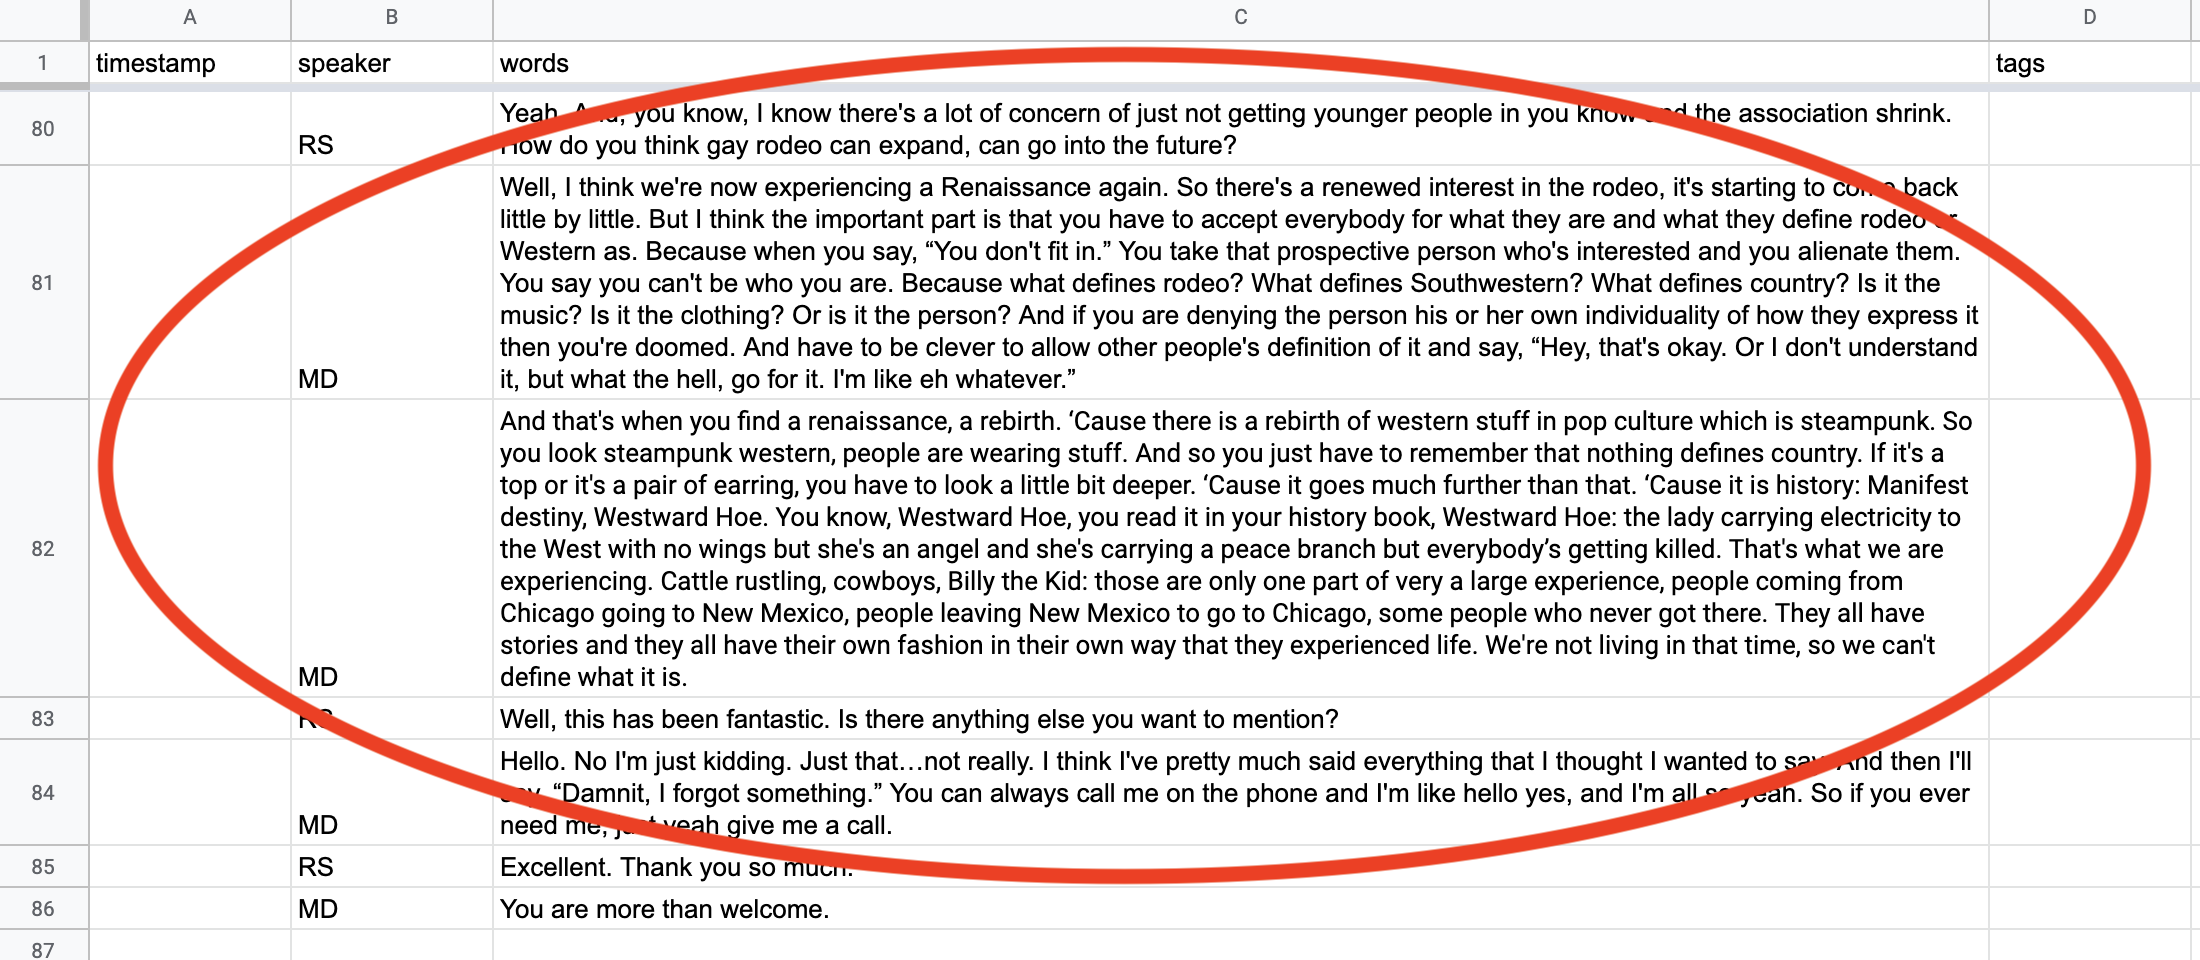
Read Your Transcript
Now you’ll need to read through your interview with three goals:
- Correcting typos
- Separating big blurbs of text into smaller chunks
- Locating timestamps
Separating Text
-
If you encounter an especially large cell of text, you can create a new row below that cell and separate the text into two parts
-
To separate a cell like this:
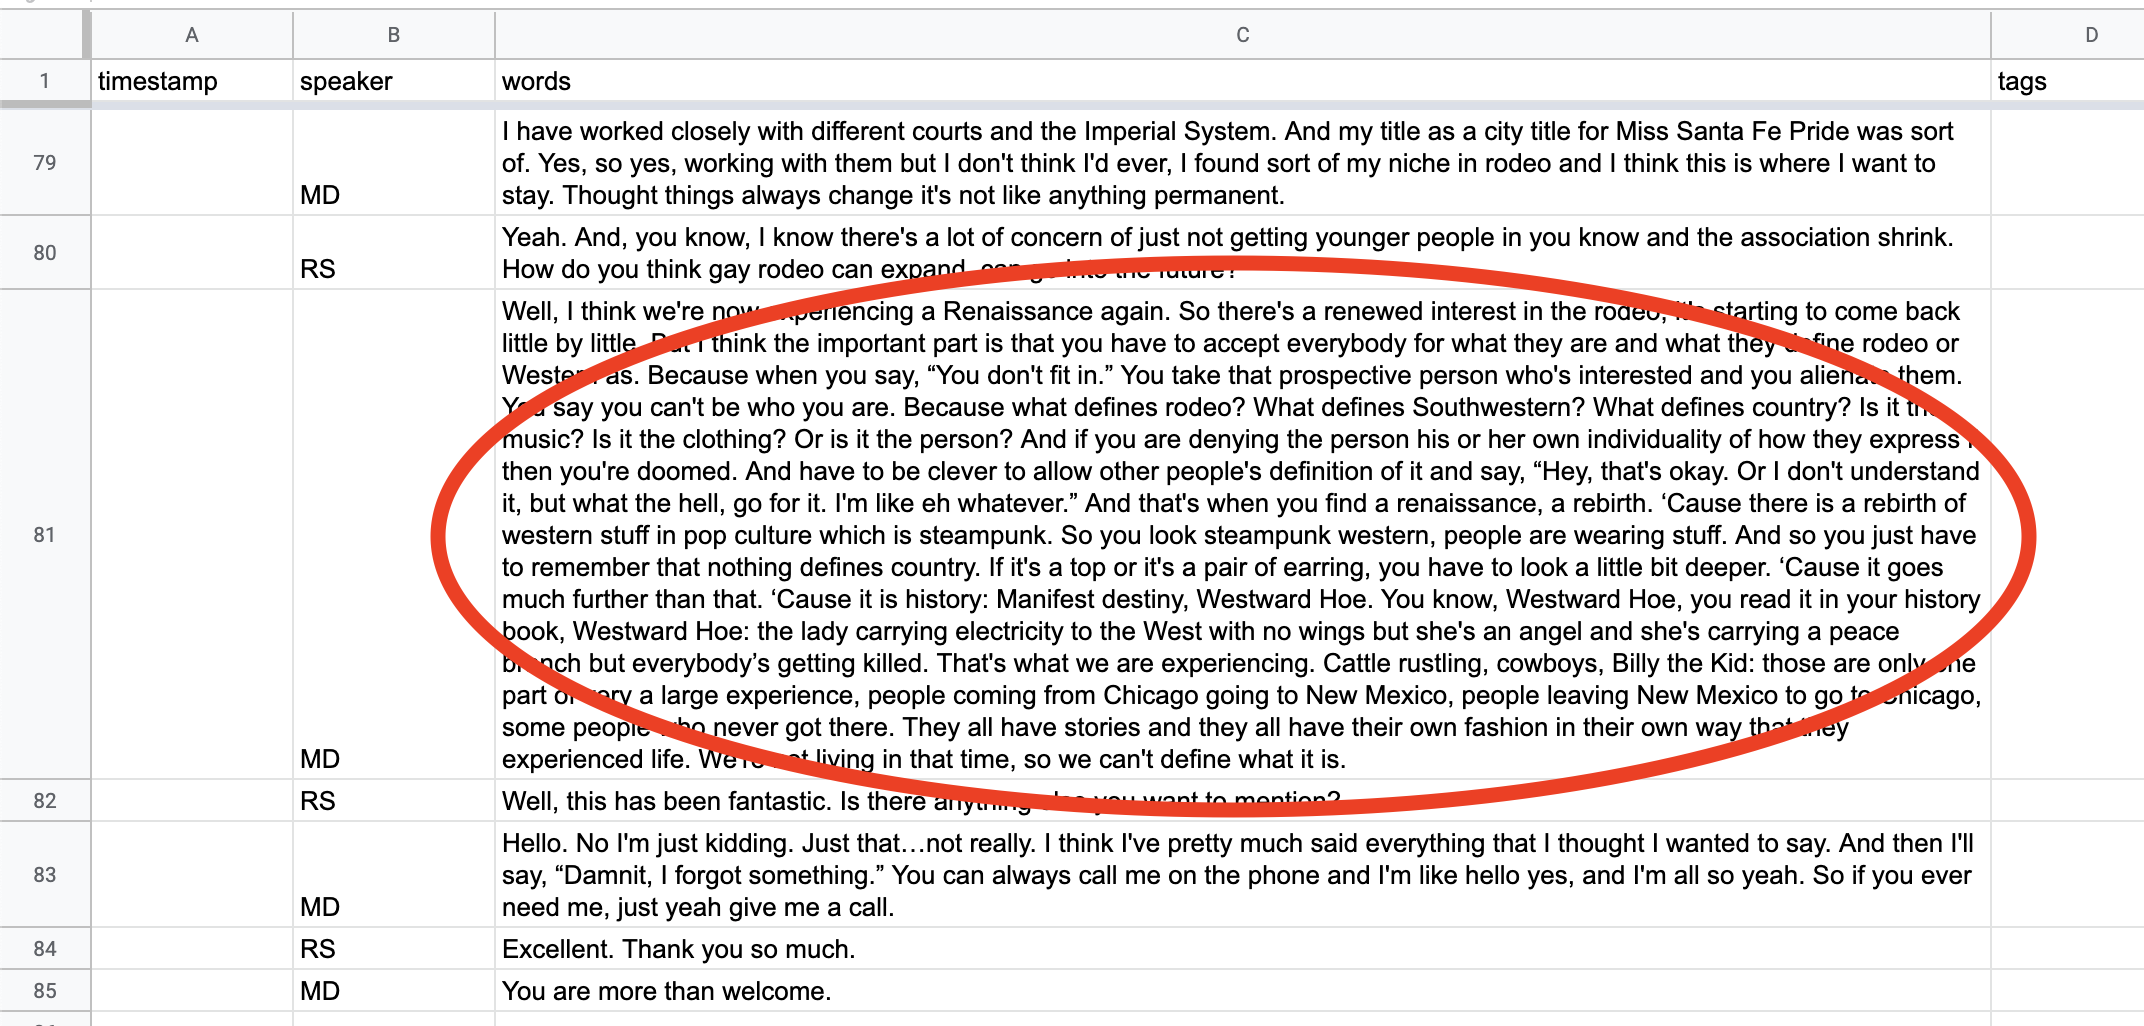
-
Select the row so it’s highlighted in blue
-
Click on that row with two fingers, and select
Insert 1 below
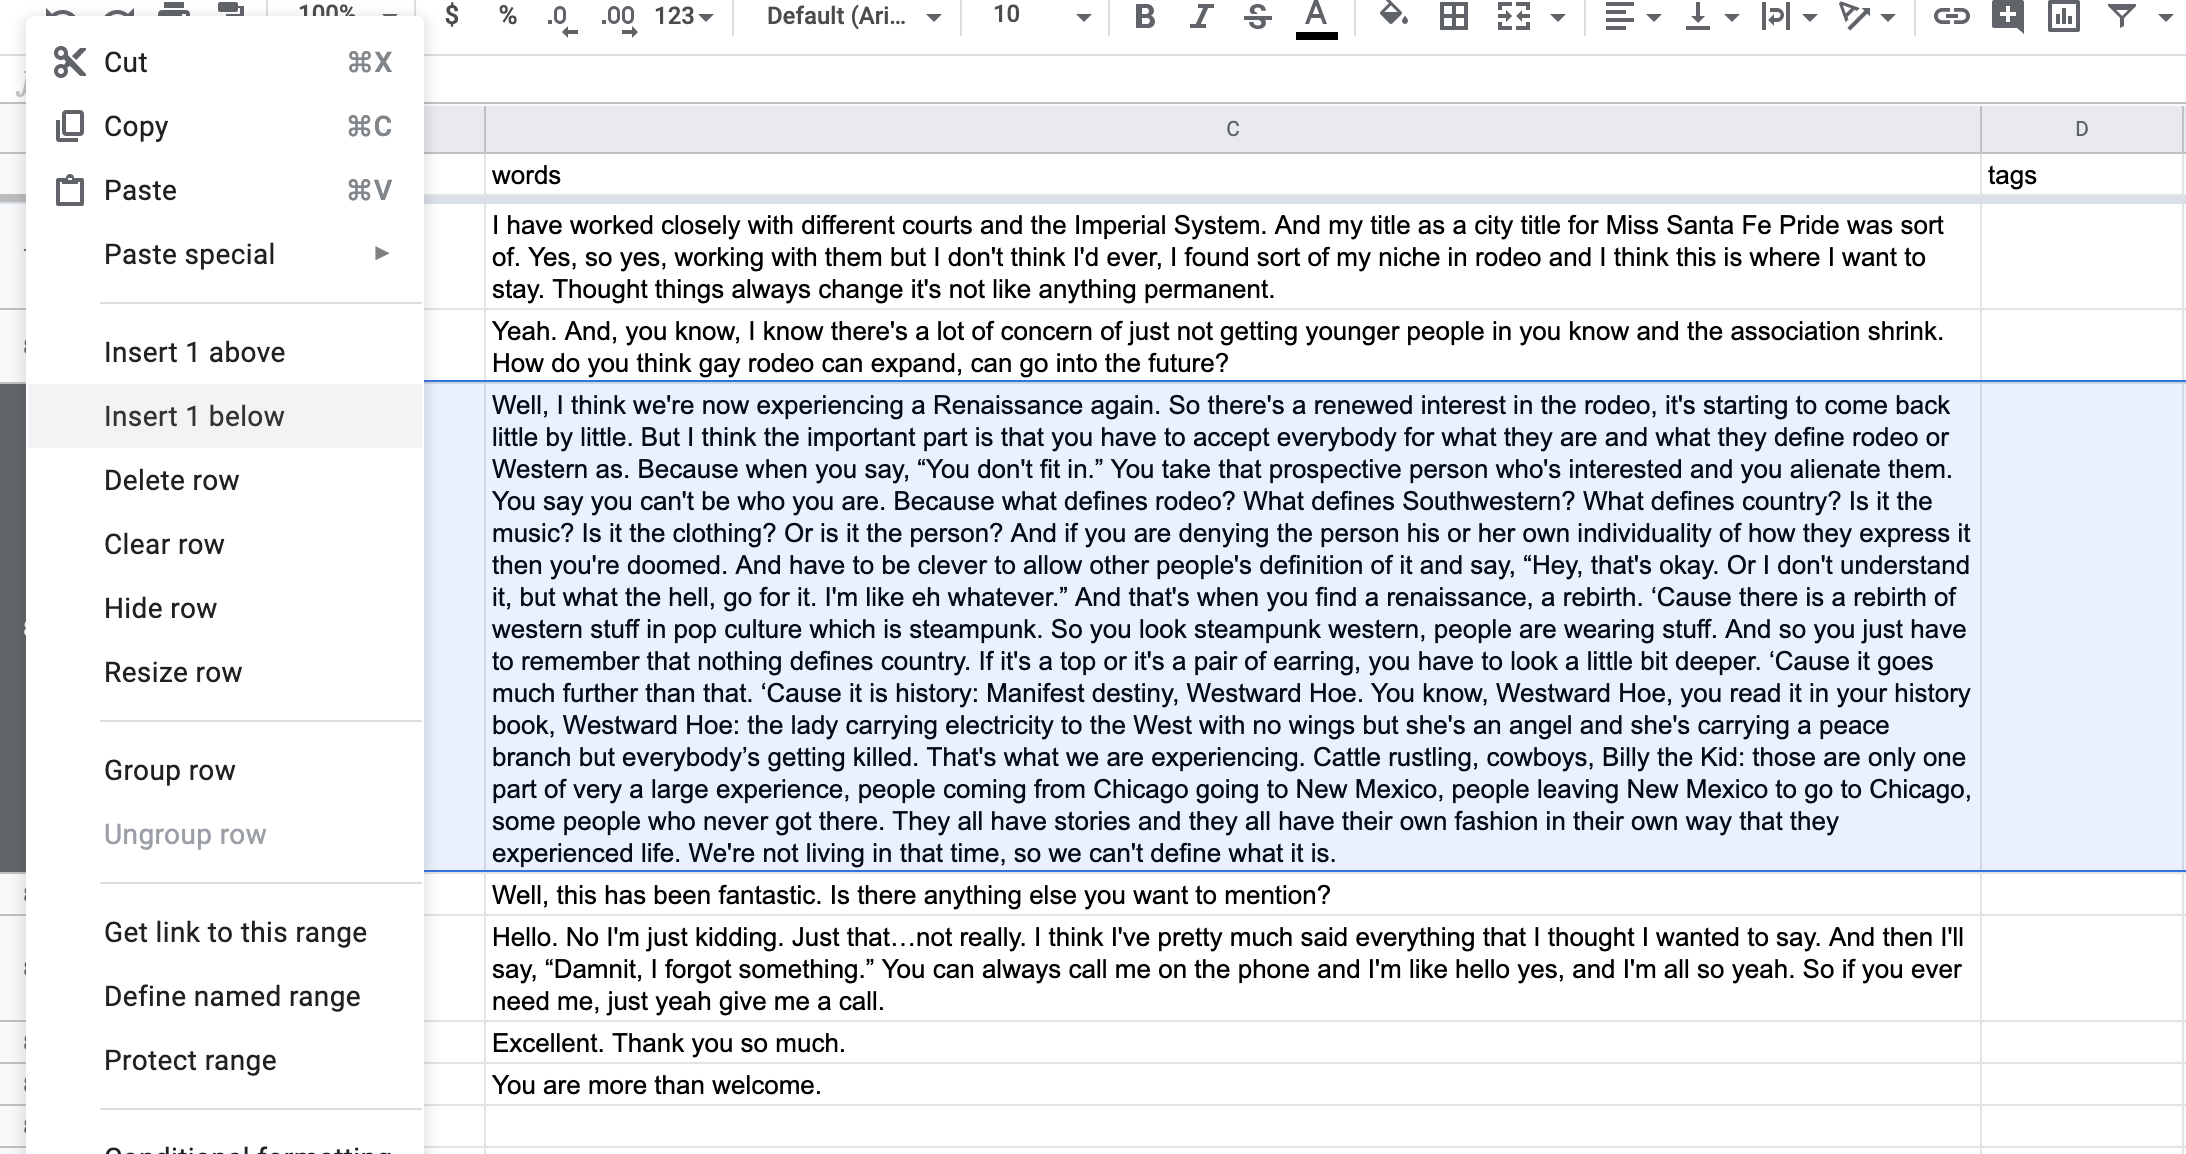
-
Insert the speaker’s initials into the new
speakercell -
Select and copy half the text from the original
wordscell, and paste it below into the cell you just created (make sure to also delete the text you just pasted from its original cell) -
Finished, your split cell should look like this:
Locating and Moving Timestamps
- Timestamps are located periodically throughout the interview at the end of the text in the
wordscells:
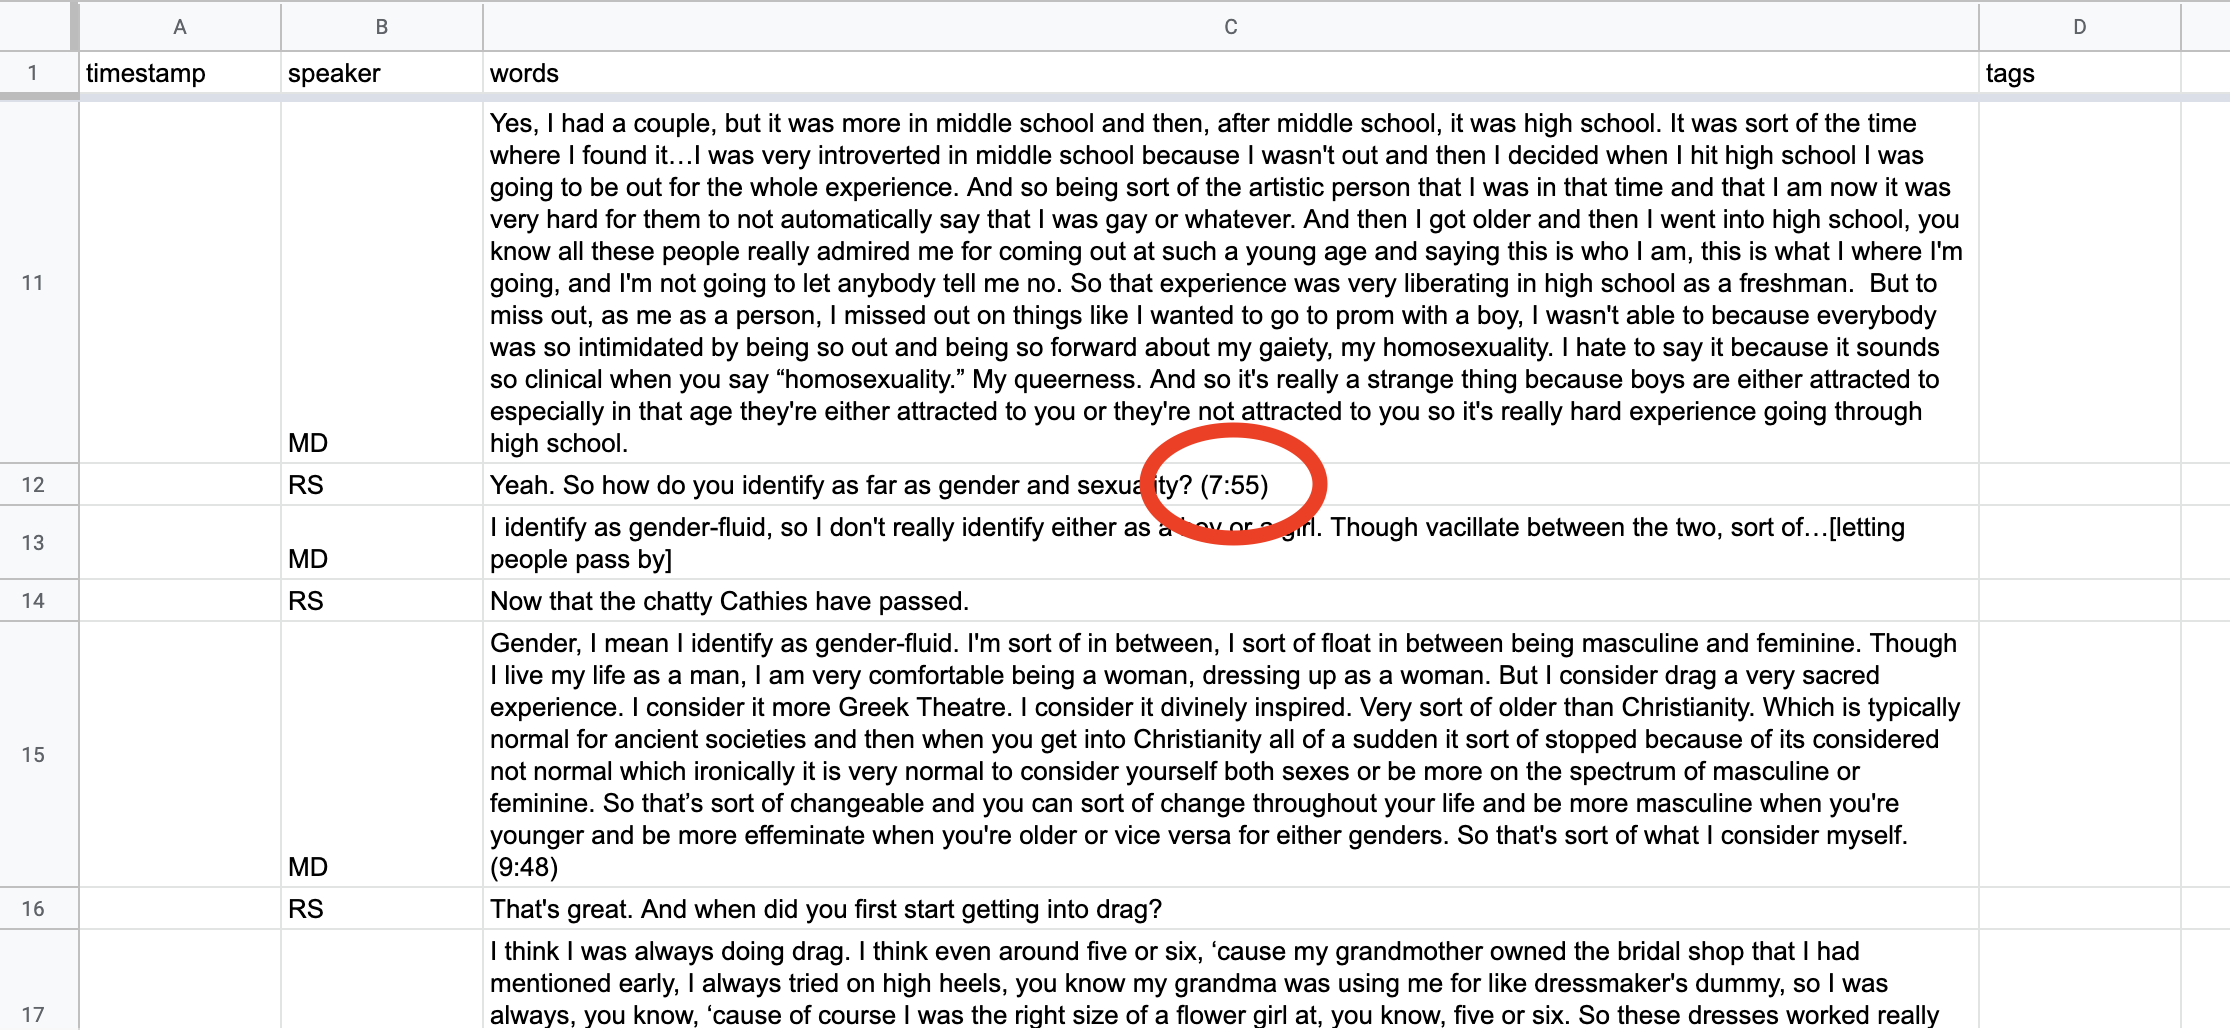
-
These need to be moved to the
timestampcolumn -
When you come across a timestamp:
-
Change the datatype of the
timestampcolumn to “Duration”:- To do this, select the entire
timestampcolumn, so it’s highlighted. Then, in the Google Sheets menu selectFormat>Number>Duration
- To do this, select the entire
-
Copy and paste the timestamp you found into that row’s
timestampcell -
Replace the parentheses (
()) with brackets ([]) -
Put it into the format
[HH:MM:SS]whereH= hour,M= minute, andS= second- Example:
(7:55)should become[00:07:55]
- Example:
-

Name Your Transcript
-
Name your transcript spreadsheet file using the following format with the interviewee’s preferred name:
lastnamefirstname(all lowercase) (example:bergmannroger) -
If the interviewee has elected not to use his or her whole last name, use the first initial of their last name in place of their last name:
initialfirstname(example:broger) -
If the interviewee has elected not to use his or her last name at all, simply title the transcript with their firstname:
firstname(example:roger)
Make a Copy of Your Transcript Spreadsheet
-
Create a new Google Sheet
-
Copy and paste the contents of the sheet you just created into this new sheet
-
Name this new sheet according to the naming conventions above, adding
_originalto the end of the file name -
Set this
_originalsheet aside; it will serve as the full transcript spreadsheet for the archives