Add Your Content to the Web
- Create a GitHub Account
- Upload Your Transcript
- Create a Markdown File
- Upload an Image
- Check GitHub Pages
- Make Changes Live
Create a GitHub Account
If you already have a GitHub account, skip this step.
-
Go to https://github.com/.
-
Create an account.
-
Check your email to verify your account.
Upload Your Transcript
Head over to the Voices of Gay Rodeo Development GitHub Repository. This is where all the source code for the Voices of Gay Rodeo website is stored. We’ll use your GitHub username to make you a collaborator for this repository.
The repository looks something like this:
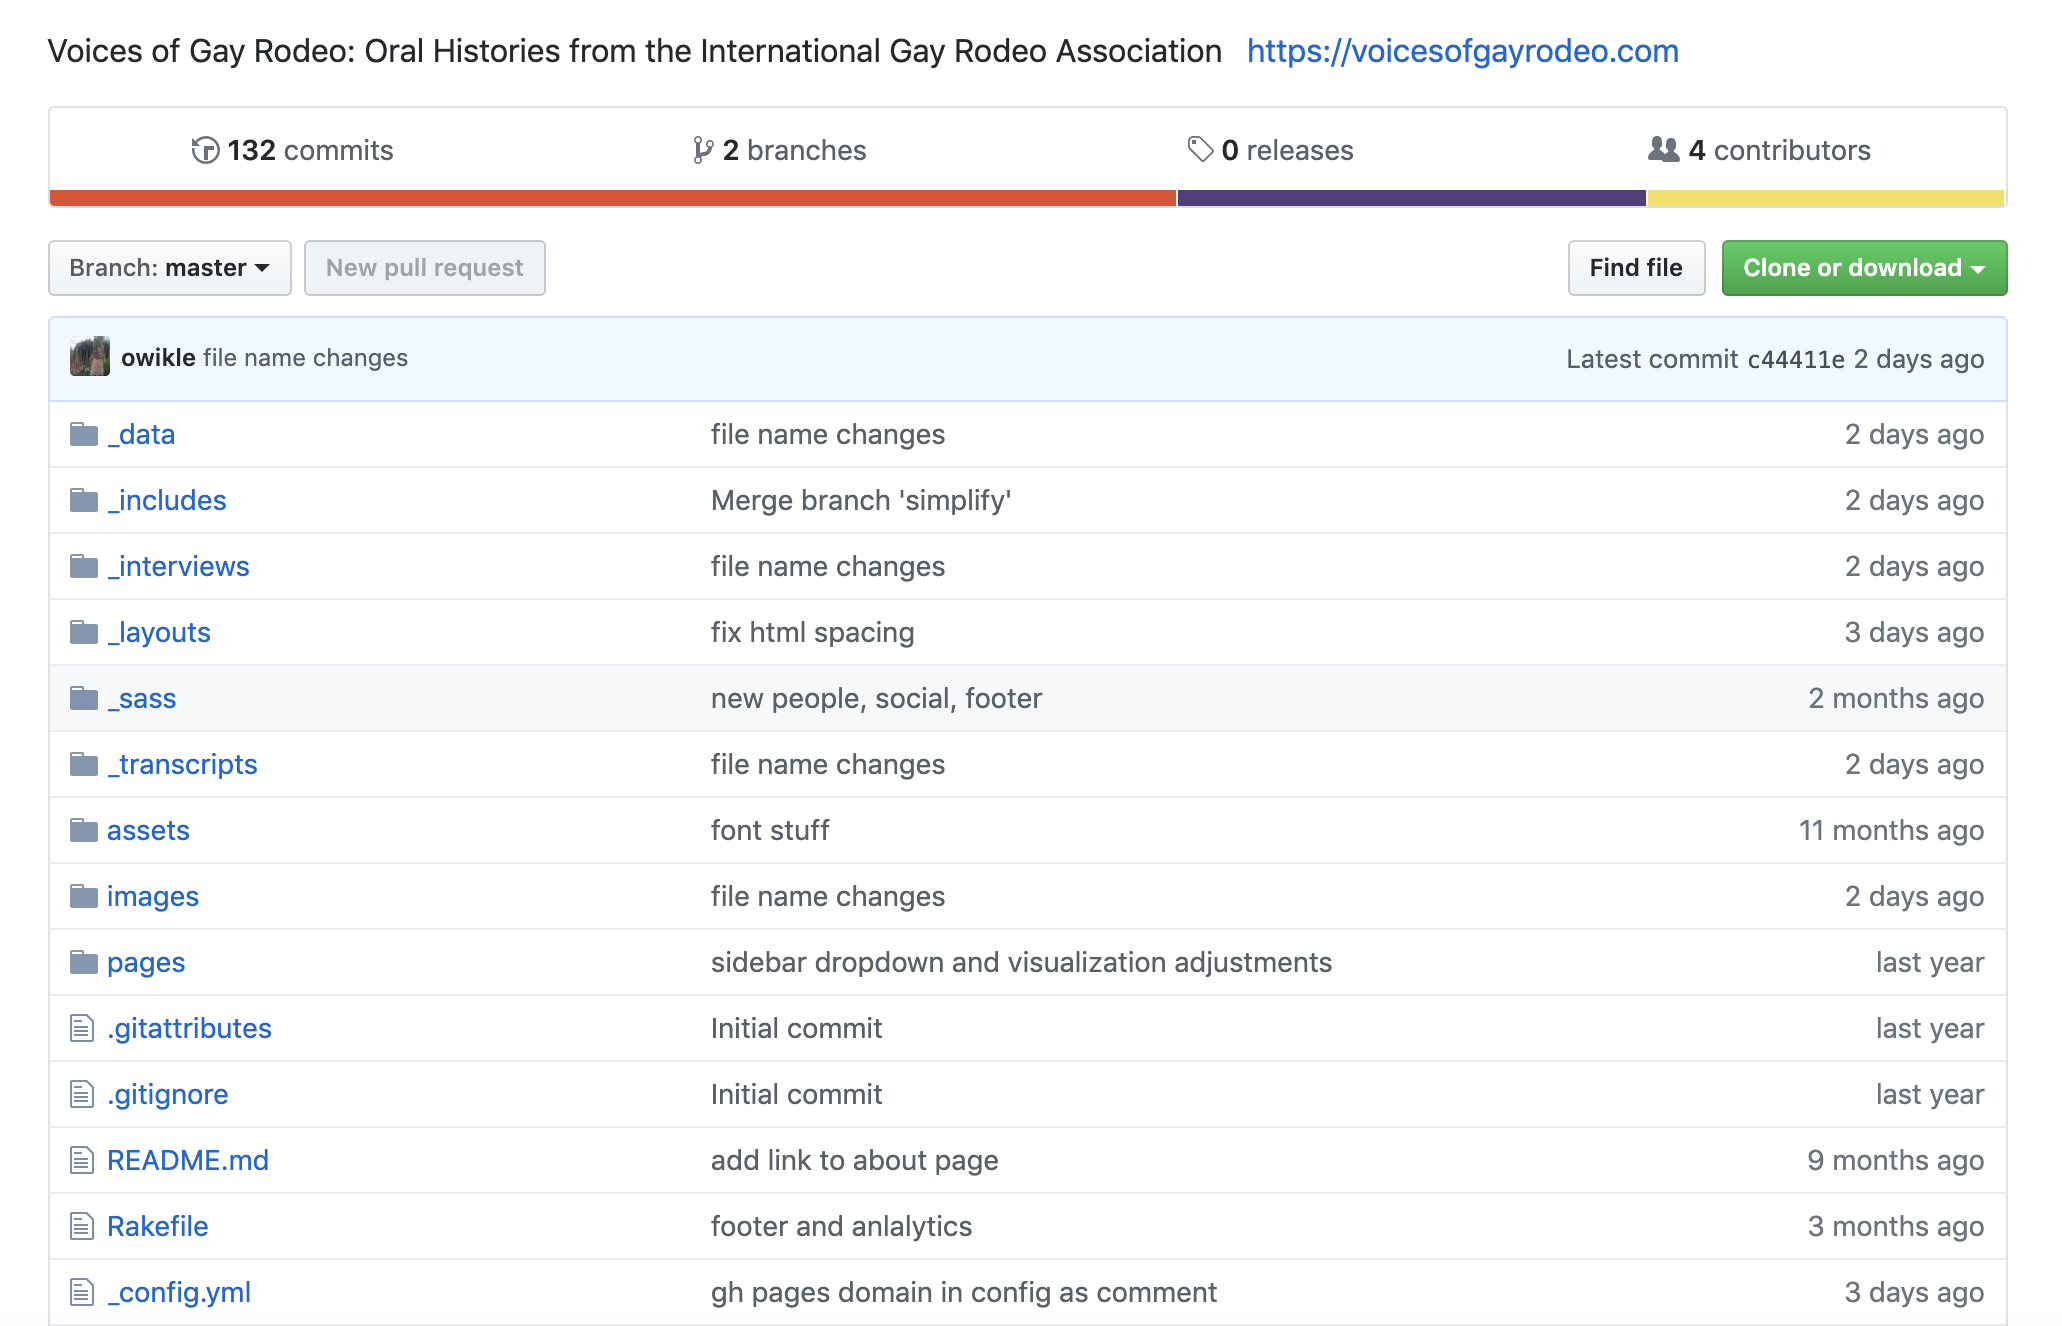
Once you’re a collaborator, you’ll have the ability to upload and edit files in the repository.
How to Upload
-
Navigate to the
_datafolder (located at the top of the repository). Click on the_datafolder. -
Inside the
_datafolder, you’ll see another folder labeledtranscripts. Click on thetranscriptsfolder. -
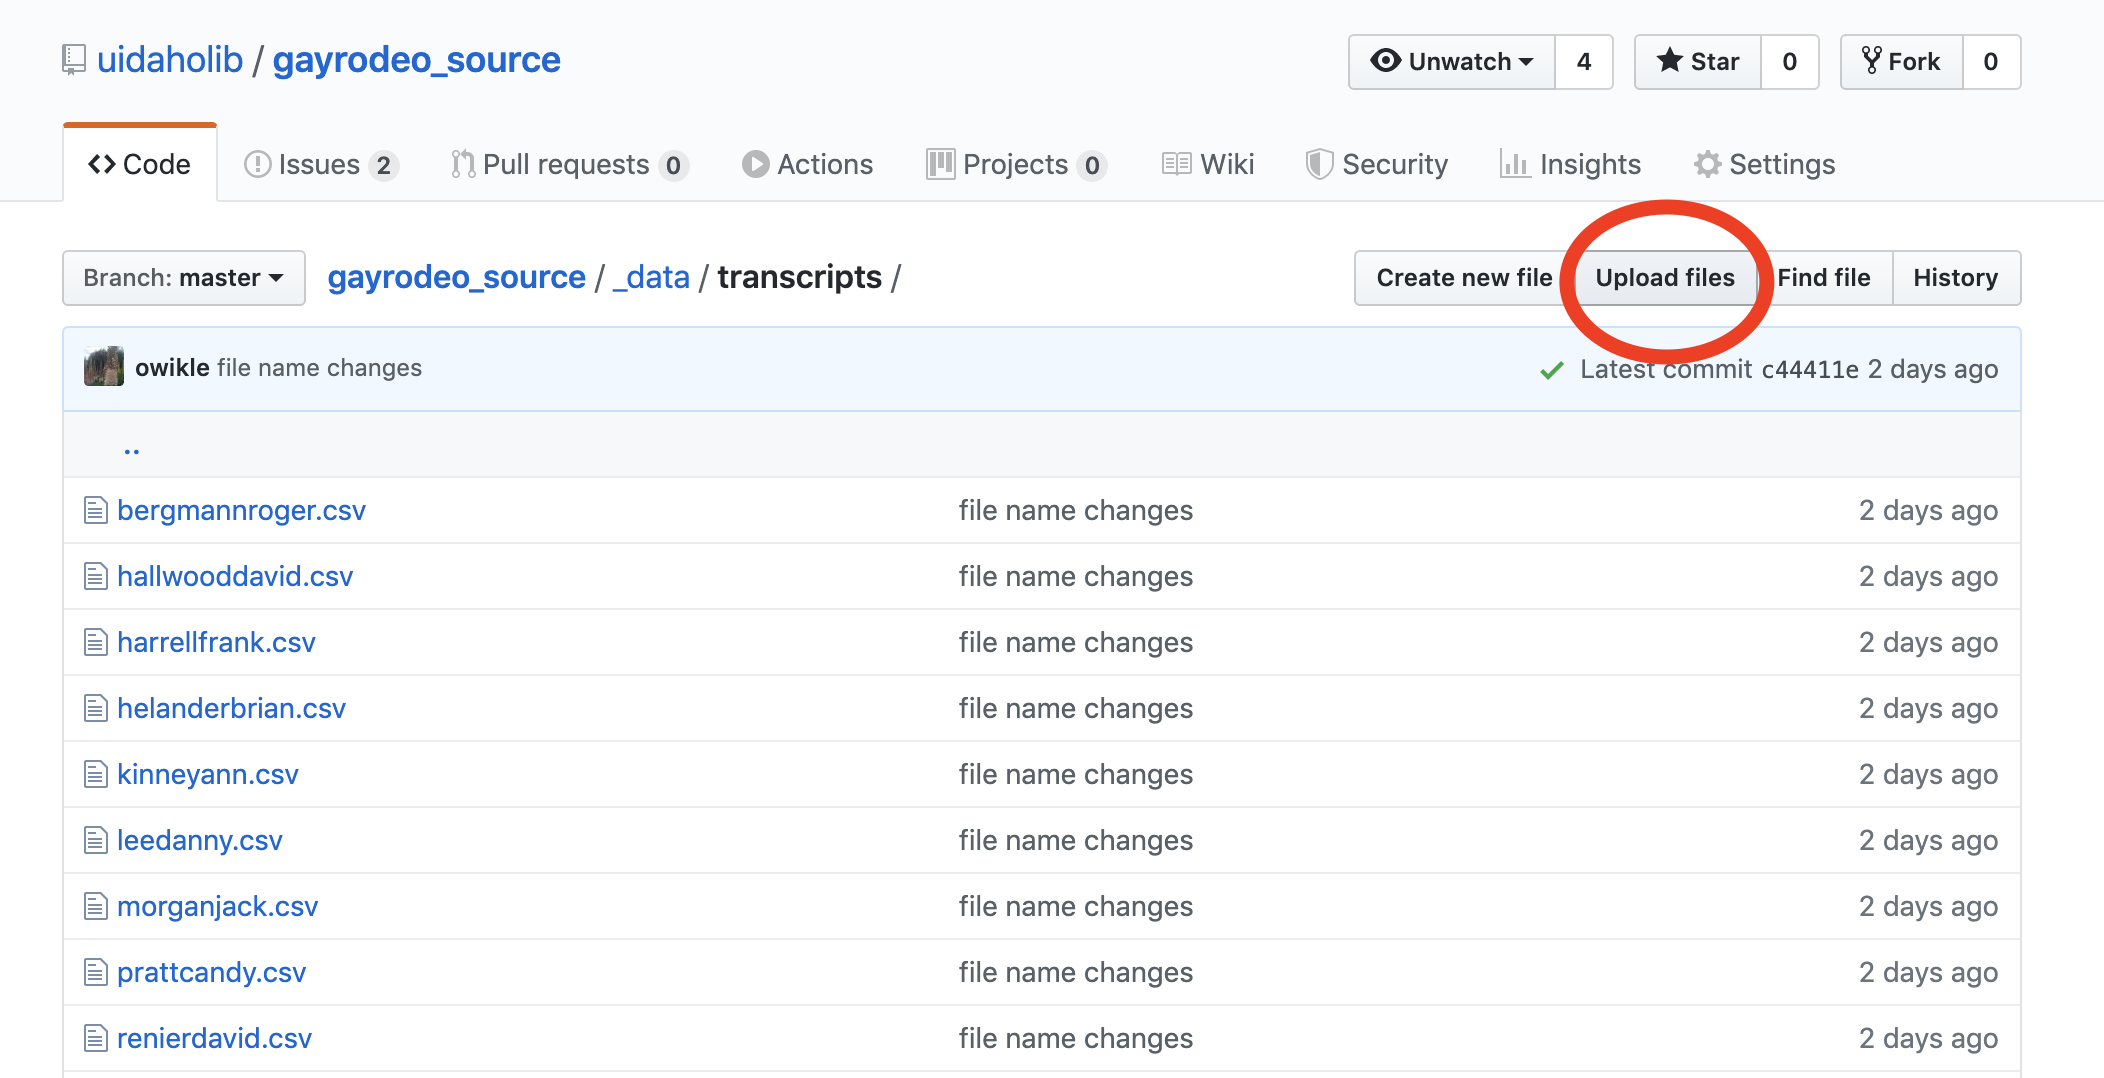
Now you should see a list of transcript CSVs (see the screenshot below). Let’s add yours.
-
In the top right of your screen, locate and click on the button labeled
Upload files.
-
Find your transcript CSV in your computer’s File Explorer (PC) or Finder (Mac) and drag and drop it into the space that says “Drag files here.”
-
“Commit” your upload: In the text box near the bottom of the screen under “Commit changes,” write a short message that describes what change you made.
-
When you’re satisfied with your message, click on the green
Commit changesbutton.

- Your transcript has now been successfully uploaded.
Create a Markdown File
We need to create some biographical information for your interviewees so that their interview and transcript pages have the appropriate context.
To do this, you’ll be creating a Markdown file. You don’t need to know anything about Markdown other than what is discussed below.
There are two major steps you’ll need to undertake in this section:
Creating Your Markdown File in _interviews
-
Starting back at the home page of the Voices of Gay Rodeo GitHub Repository, click on the folder labeled
_interviews. -
In the top right, click on the button labeled
Create new file.

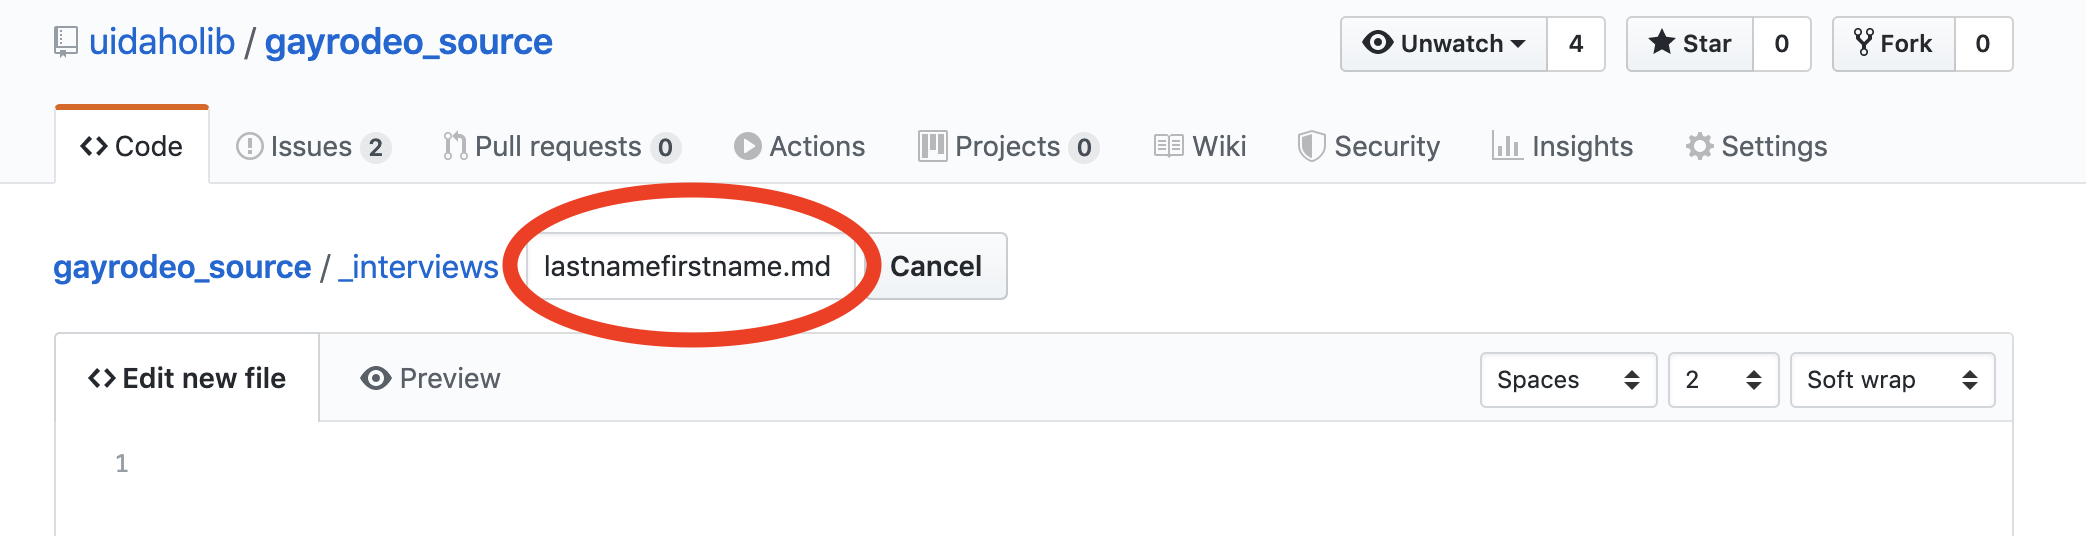
- Name your file the same name you gave your transcript (using the format
lastnamefirstname). End your file name using the extension.md(this stands for Markdown).
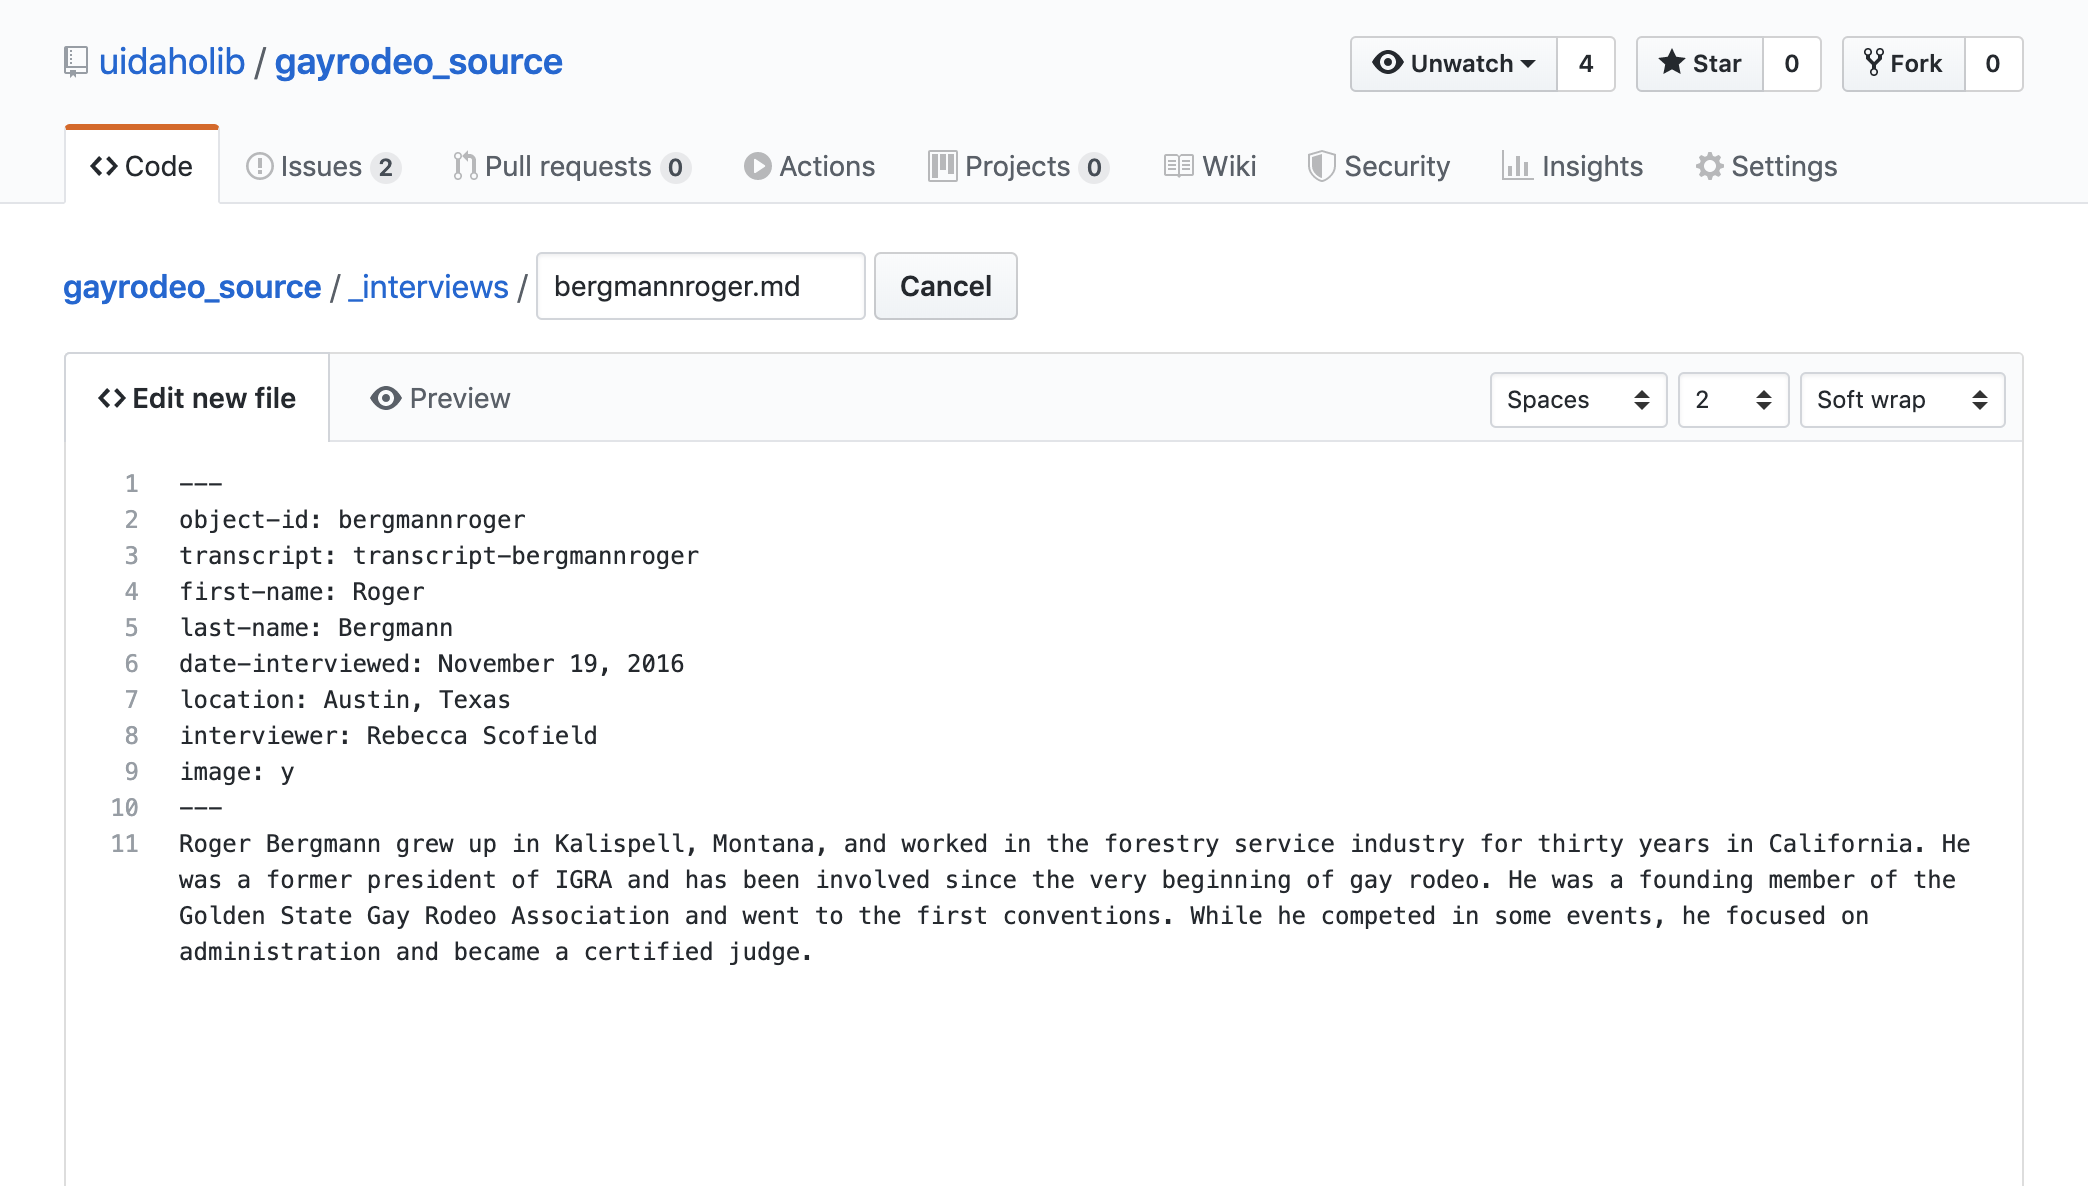
- Copy all of the following (including the hash marks (
---)!) into the body of the file:
---
object-id: bergmannroger
transcript: transcript-bergmannroger
first-name: Roger
last-name: Bergmann
date-interviewed: November 19, 2016
location: Austin, Texas
interviewer: Rebecca Scofield
image: y
---
-
What you’ve just copied is called YAML front matter. The fields before the colons (
:) are called Variables, and the entries after the colons are the value of each variable. -
In order for your new pages to show up on the website, you need to (1) delete the current values (everything to the right of the colons), and (2) enter values that describe the interview you just uploaded.
- Follow the example values you copied into your document, or see the table below for more detail:
Formatting Your Markdown File
| Variable: | Format: | Example: |
|---|---|---|
| object-id | transcript filename, in format lastnamefirstname (all lowercase) | bergmannroger |
| transcript | 'transcript-' prepends transcript filename (all lowercase) | transcript-bergmannroger |
| first-name | Firstname (first letter capitalized) | Roger |
| last-name | Lastname (first letter capitalized) | Bergmann |
| date-interviewed | Month DD, YYYY | November 19, 2016 |
| location | City, State | Austin, Texas |
| interviewer | Firstname Lastname (first letter capitalized) | Rebecca Scofield |
| image | if interviewee has provided an image for the website, the input is y; if no image, the input is n (stock image will display) | y |
-
Now you should have updated all the variables between the hash marks (
---). The last step is to add a biographical paragraph about your interviewee underneath the second row of hash marks. -
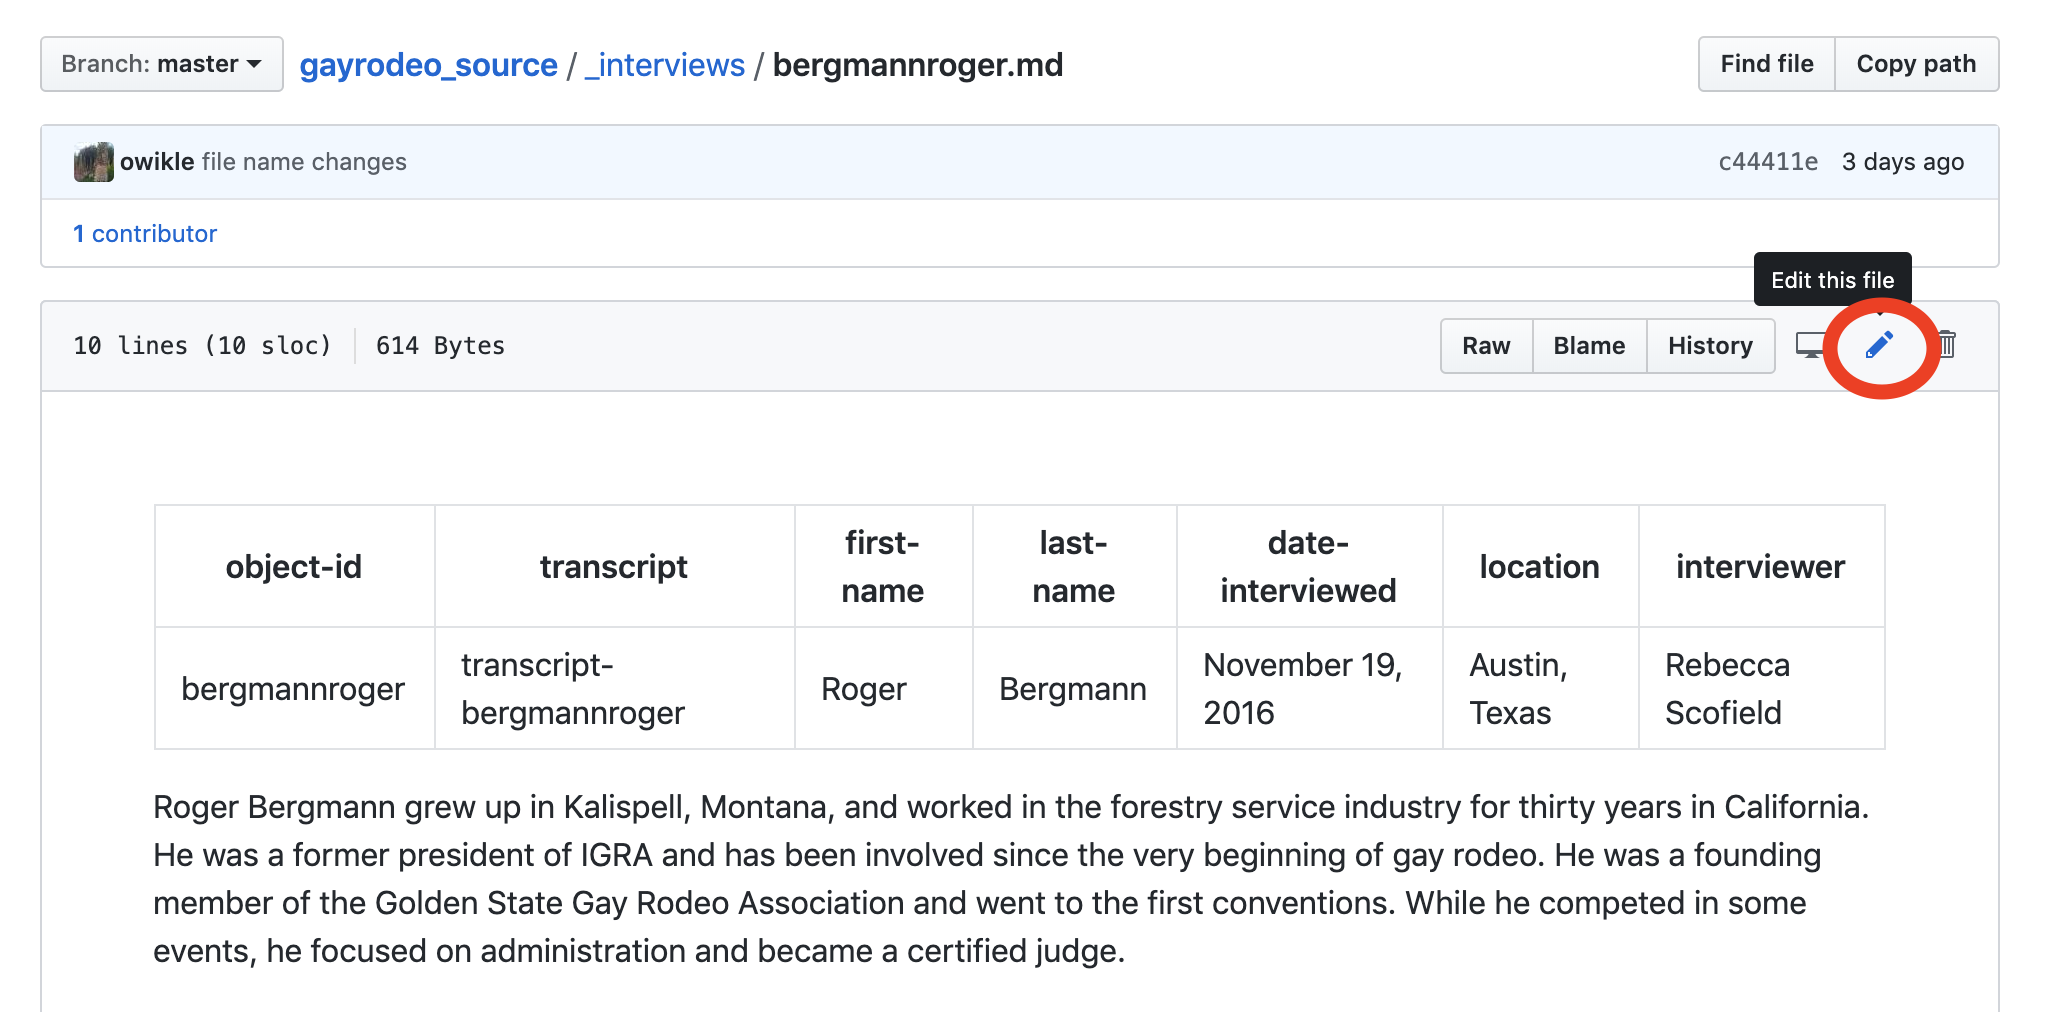
When you’re finished, your markdown file will look something like this:
-
Before committing this file, copy all of the text in the body of the file (you’ll need it for the next section):
- Place your cursor anywhere in the file
- Select All: Press
ctrl+a(on PC) orcmd+a(on Mac) - Copy: Press
ctrl+c(on PC) orcmd+c(on Mac)
- Scroll to the bottom of the page, enter a commit message, and press the green
Commit changesbutton.
Editing Your Markdown File
If you want to make an edit to your markdown file after committing, follow these steps:
- Click on your markdown file
- Click on the pencil icon in the top right corner
- Make your new changes and commit them
Copy Your Markdown File to _transcripts
-
Starting back at the home page of the Repository, click on the folder labeled
_transcripts. -
In the top right, click on the button labeled
Create new file. -
Name your file the same name as the markdown file you just created in
_interviews(Don’t forget to add the extension.mdto the end!). -
Paste the content from the markdown file you just created in
_interviews:- Place your cursor in the body of the file
- Paste: Press
ctrl+v(on PC) orcmd+v(on Mac)
- Scroll to the bottom of the page, enter a commit message, and press the green
Commit changesbutton.
Upload an Image
-
Make sure the image you’re uploading has the same file name as the transcript and markdown file you labeled earlier (
lastnamefirstname). The image should have either a.jpgor.pngextension. -
Find the
imagesfolder from the home page of the repository. Click on it. -
Inside the
imagesfolder, you’ll find a folder labeledpeople. This is where all the images of interviewees are stored. Click into this folder. -
In the top right of the screen, find and click on the button labeled
Upload files. -
Drag and drop your file into the repository.
-
Write a commit message, and click the green
Commit changesbutton.
Check Your Upload Using GitHub Pages
-
Wait a few minutes after your last commit for the repository to update.
-
Follow this link: https://thecdil.github.io/gayrodeo_dev/ to see how the interview you added looks on the demo site.
Make Your Changes Live
- When your interview is ready to be made live on the official Voices of Gay Rodeo website, email Olivia Wikle and Devin Becker. Be sure to include the name of the interview you added in your email.